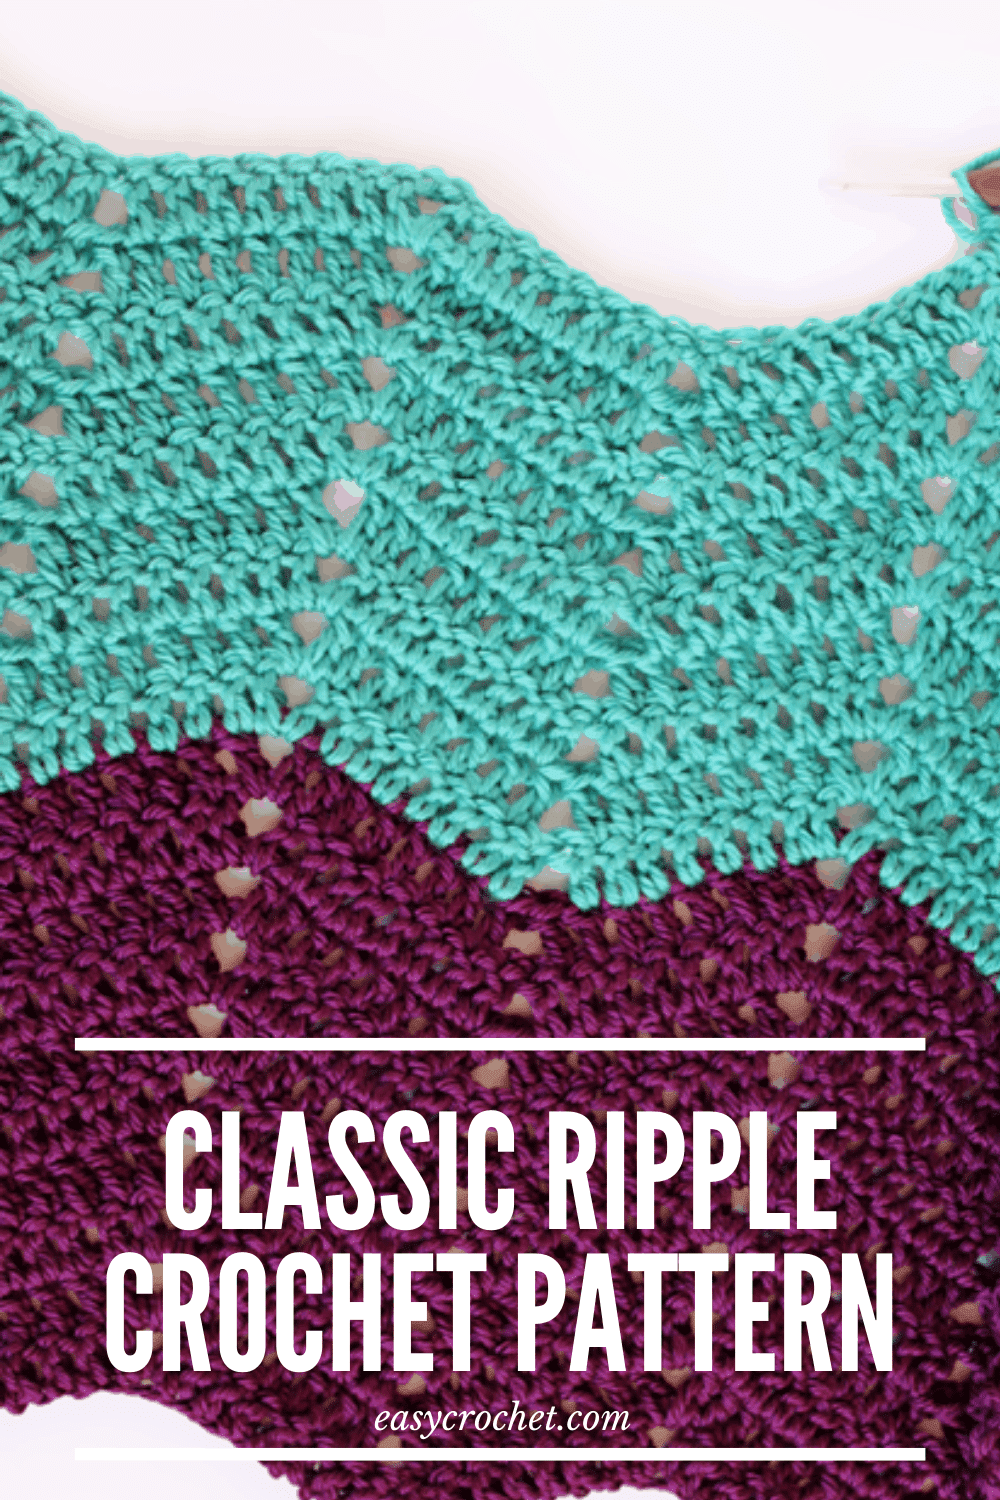
Classic Ripple Crochet Pattern Tutorial
Learn how to crochet a ripple blanket today with this ripple stitch tutorial!
Use this simple step-by-step tutorial to make a crochet ripple afghan, throw blanket, baby blanket, or even a scarf!
Classic Ripple Blanket
Do you love learning new crochet stitches? I can’t wait for you to use the ripple stitch and start crocheting all kinds of projects! Read on down to find the full free ripple crochet pattern!
Happy Ripple Crocheting!
Crochet Ripple Stitches
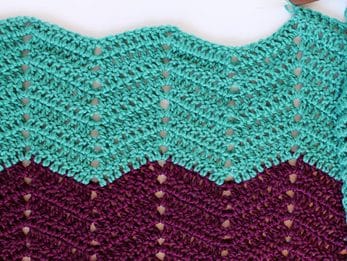
This crochet ripple pattern tutorial is simple to get the hang of and works up fast once you get the stitch repeats down. If you can double crochet and double crochet two together, then you can make this wave design!
The Stitches
Learn more about the double crochet stitch below.
Double Crochet (dc):
- Wrap the yarn over (Yo) the hook, insert the hook into the specified st.
- Yo the hook again, draw the yarn through the st, so there are 3 loops on the hook
- Yo the hook again draw it through 2 loops, so there are 2 loops on the hook
- Yo the hook, draw it through the final 2 loops.
Double Crochet Two Together (dc2tog)
How to Double Crochet Two Together (aka dc decrease)
- Yarn over, pick up a loop in next st
- Yarn over, draw the hook through 2 loops
- Yarn over, pick up a loop in next st
- Yarn over, draw through 2 loops on hook
- Yarn over, draw through three loops on hook
Once you get the hang of the double crochet used in the pattern below, you will love creating scarves, blankets, and anything you can think of with this elegant ripple stitch design.
The Yarn That’s Perfect for This Ripple Afghan Pattern!
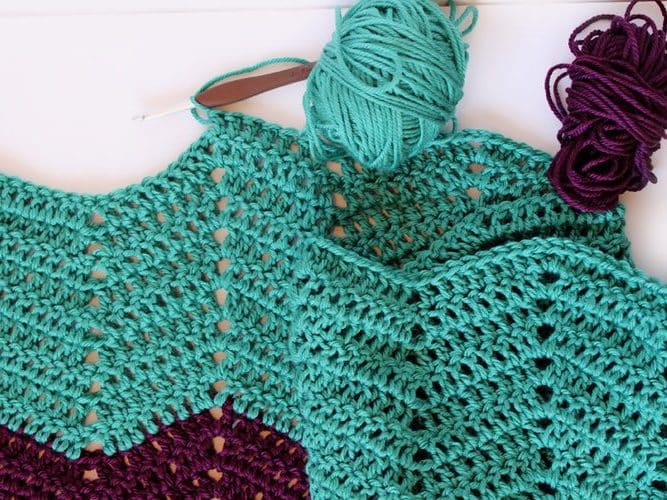
For the entire tutorial, I worked with Red Heart Soft Yarn, which is a 100% acrylic fiber four weight yarn. You can find this yarn in many colors, but for this blanket I used the yarn colors Sea Foam and Berry.
This yarn is amazingly soft and is easy to find in most craft stores! It also works up beautiful in most crochet projects, so you’ll definitely love how this yarn has fantastic drape and coziness.
Click the Red Heart Soft yarn image below to check it out!

You are welcome to use any color you wish, or the same as I did. Have fun with it, and remember any yarn color would look pretty wonderful with this blanket design.
Read on down to learn how to make a classic ripple in crochet today!
Happy Crochet Ripple Making!
Classic Ripple Crochet Pattern Tutorial
Skill Level: Easy
Materials
- Any yarn – I used a worsted weight four yarn, Red Heart Soft Yarn
- Crochet hook 6 mm (J-10). (I used a Clover Amour Crochet Hook for this tutorial)
- Yarn needle
- Scissors
Notes
- The free pattern is written in Standard US terms
- Learn how to change colors in crochet with our easy color changing technique.
- Once you learn the tutorial below, you will be able to apply it to crochet a scarf or a blanket with this ripple design.
- Use the blanket size calculator to change blanket sizes.
The Classic Ripple Crochet Pattern
BEGIN: Start by chaining a multiple of 17 (example 17, 34, 51, etc.)
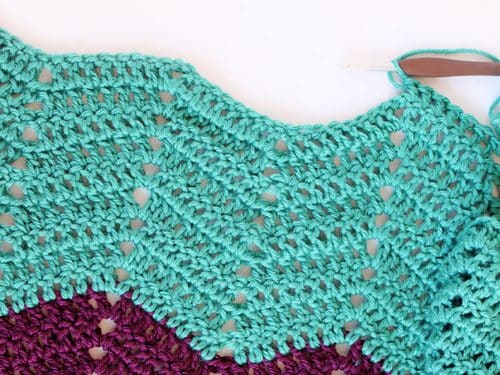
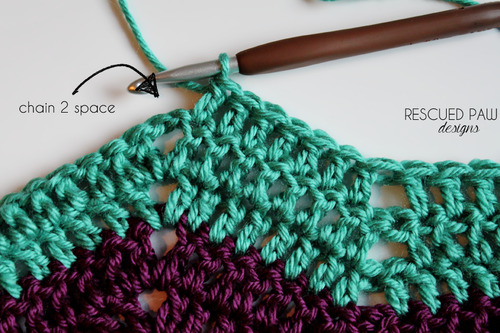
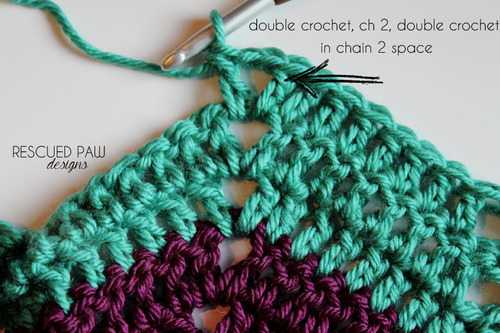
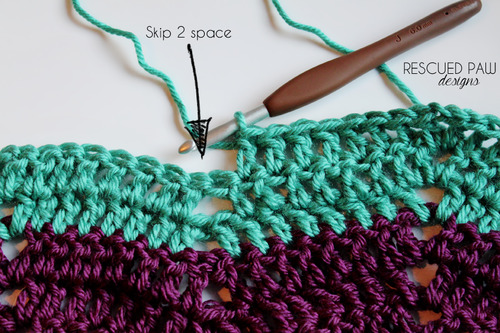
ROW 1: 1 double crochet in 4th chain from hook, 1 double crochet in next 5 chains. (1 double crochet, chain 2, 1 double crochet) in next chain, 1 double crochet in next 7 chains, * Skip 2 chains, 1 double crochet in next 7 chains, (1 double crochet, chain 2, 1 double crochet) in next chain, 1 double crochet in next 7 chains, repeat from * across until you reach the end, turn.
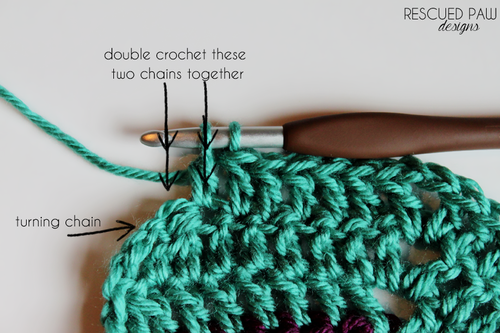
ROW 2 : Chain 3, skip 1st stitch, double crochet 2 together (see notes). 1 double crochet in next 5 stitches (1 double crochet, chain 2, 1 double crochet in the chain 2 space from the previous row)
ROW 2 CONTINUED: *1 double crochet in next 7 chains, skip 2 chains
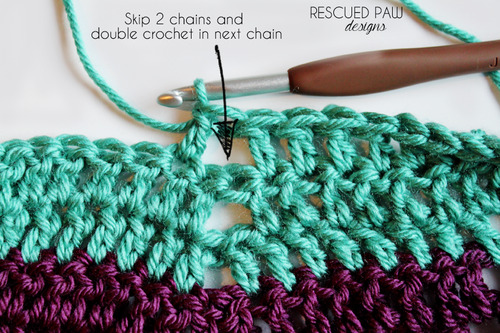
ROW 2 CONTINUED: double crochet in the next 7 chains (1 double crochet, chain 2, 1 double crochet) in next chain 2 space. Repeat from * across until last 8 stitches. 1 double crochet in next 5 stitches, double crochet 2 chains together (see notes) 1 double crochet in top of turning chain, turn.
- Repeat row 2 for the pattern
FINISHING: When you have reached the desired length of your blanket, you can fasten off the yarn and weave in the loose ends throughout with a yarn needle.

I hope you like this how to do a crochet ripple tutorial! If you need any clarification, please feel free to ask me anytime. Meanwhile, take a look at some of our free crochet blanket patterns and tutorials below.
More Crochet Patterns + Tutorials
- 30 Free Crochet Baby Blanket Patterns
- Primrose Crochet Baby Blanket
- 10 Cozy Crochet Blanket and Afghan Patterns You’ll Love
- Easy Moss Stitch Crochet Baby Blanket
- Rainbow Crochet Blanket Pattern
- Easy Crochet Afghan Pattern (8 Sizes)
- Easy Crochet Shell Stitch Baby Blanket
- Mountain Pine Crochet Tree Blanket
- American Flag Crochet Patterns for Blankets
- 11 Free and Easy Crochet Graphgan Patterns using C2C
I have done this stitch before but not in double stitch before but really want to make it
I love this pattern. How did you change colors
Hi Susan,
I just added a link to a color changing tutorial in the notes section of the pattern! Happy Crocheting!
-Krista
I need a bit of help. I did multiples of 17 till I got to 136 but I have 9 stitches left at the end. Is it supposed to be like that or should I end with the last 7? I have re-done it a few times now help please
Hi Ruth,
I’d suggest going back and recounting the stitches to see if you may have added or skipped stitches somewhere. You could also add some stitch markers every 20 stitches, so you’ll know for sure how many stitches are there.
-Krista
Thank you for this pattern! Your directions have been so easy to follow. This will be a pattern I go back to!
You are very welcome, Carrie! I am so happy you liked it!
– Krista
How many skeins are needed for a throw blanket? Thank you Tammy
Hi Tammy,
I have a blanket resizing calculator that works great for these types of patterns. https://easycrochet.com/calculators/blanket-crochet-resizing-calculator/
Happy crocheting!
Krista
This is by far the best Ripple Pattern I have ever seen! I am starting it right now! It is 6:30 am 🙂 Thank you very much.
Thank you, Mary!
I hope you enjoy! This ripple is one of my favorites too! If you’d like to share when you are done join us over in the Easy Crochet Facebook Group! 🙂 https://www.facebook.com/groups/easycrochet/
Krista
I started my blanket, but I’m not sure if I suppose to doble crochet together in both ends of the blanket, one end has the two chains space and the other end has first the down point and that end is not ending with the 8 double crochets I suppose to have.
Hi Fran,
I’d suggest trying again but maybe try stitch markers every 10 stitches to help. It is so easy to miss stiches with ripples and chevrons. I do it all the time so I always count & recount as I go along. Hope this helps!
Krista
Love this pattern. I am about to start working on this and was wondering if you had suggestions for how many multiples of 17 to start with to make this for a queen sized bed. Or if you know how many multiples of 17 you did and then also how wide in inches it ended up being would be great! Thanks!!
I would work multiples of 17 until you get to about 86-88 inches wide. 🙂 I do not remember how many I did for this one since it was so long ago. I wish I wrote it down in the earlier days of blogging!
Thank you for posting. 🙂