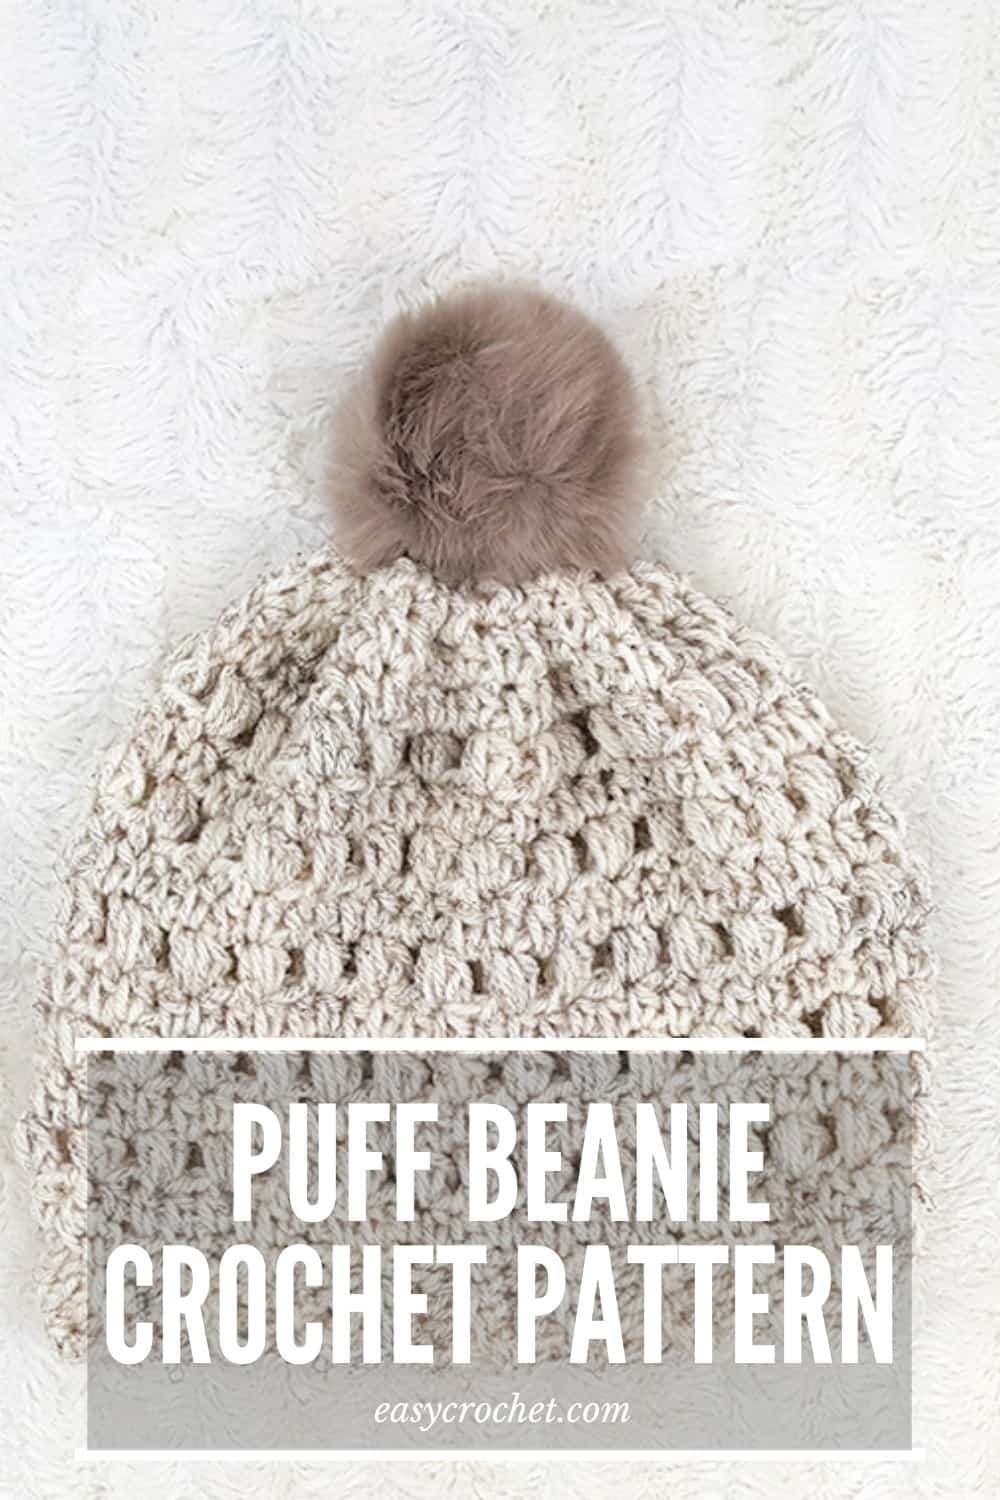
Crochet Puff Stitch Beanie Pattern
Are you searching for a fun pattern to make? Learn how to crochet this easy and fun puff stitch hat today with the free beanie pattern below!
I can’t wait to see what colors you make your crochet puff stitch hat in! I had so much fun designing this and am excited to see your creations! Happy Crocheting!
Free & Easy to Make Puff Stitch Crochet Hat!
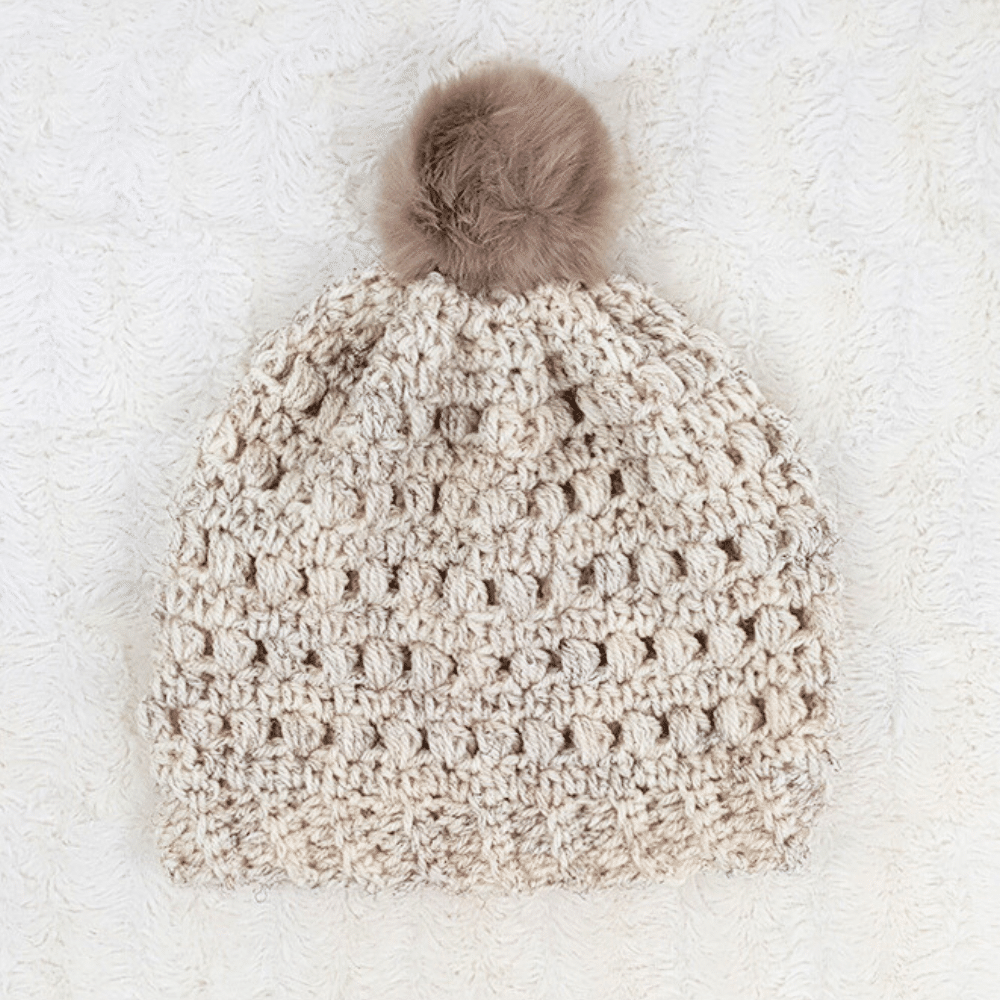
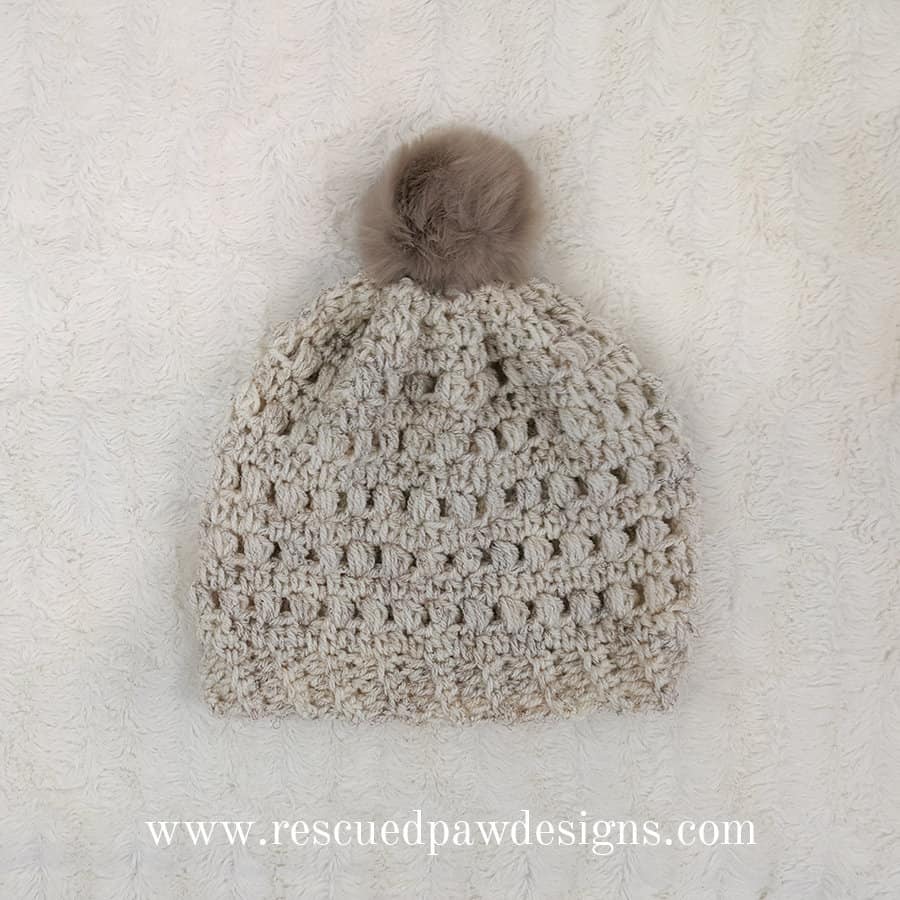
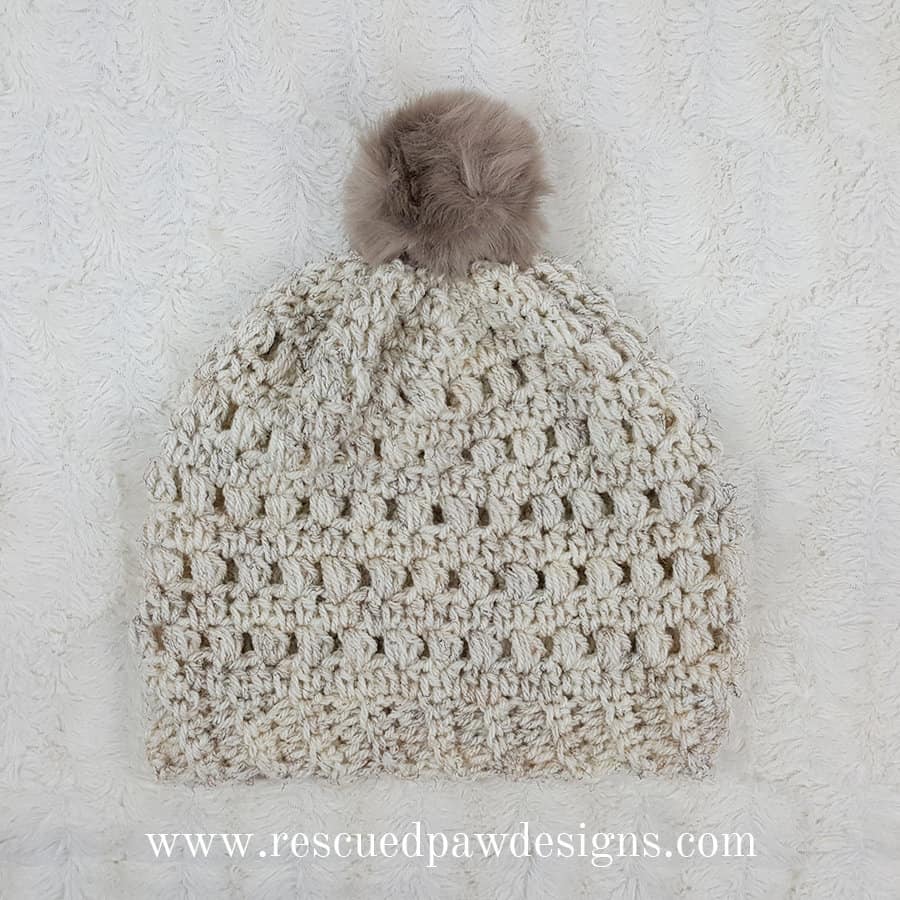
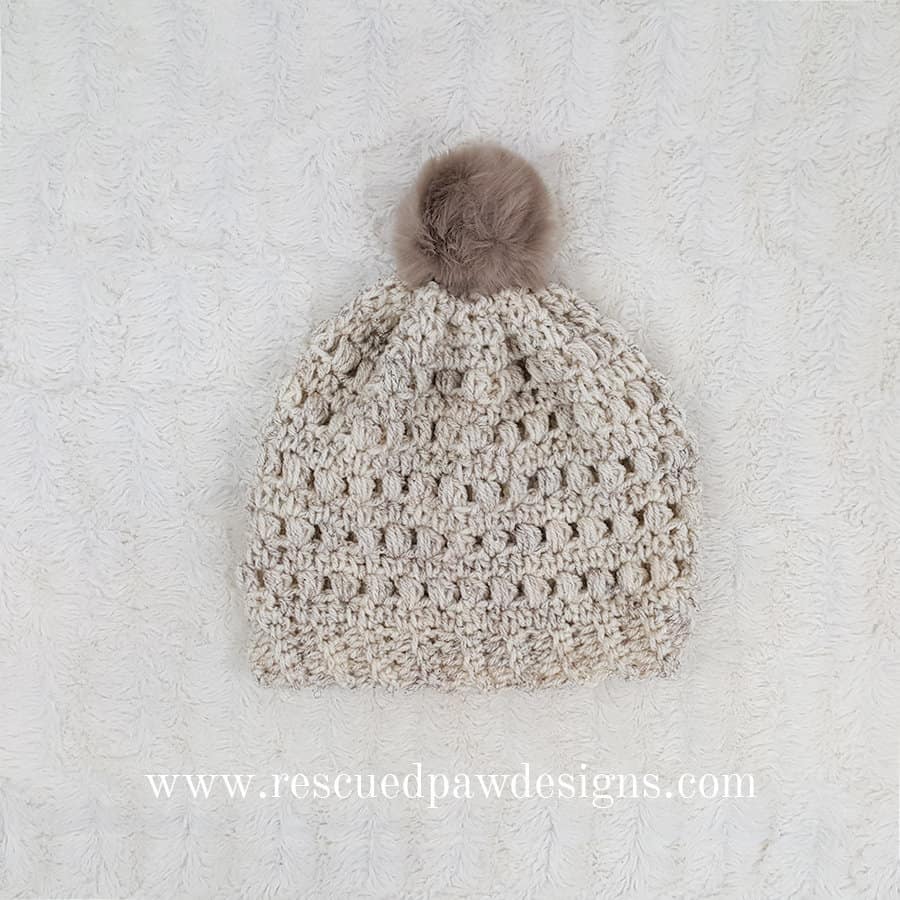
You’ll love how simple and easy it is to make! This puff stitch beanie would make the perfect chilly weather accessory. Topped with a faux fur pom which gives it the extra touch it needs to be trendy!
The Yarn That’s Perfect for a Puff Stitch Beanie
To make my beanie, I used my favorite yarn, Lion Brand Vanna’s Choice in Wheat. I love the wheat color because of the different variations of tones in this colorway. It makes this yarn a little more eye-catching than most. You’ll like it!
As of, 2021the colorway wheat is a little difficult to find, so I recommend using the color Oatmeal, which is very similar in look. Promise!
Vanna’s Choice
This yarn is made by Lion Brand, and is a Weight 4 – Medium yarn.
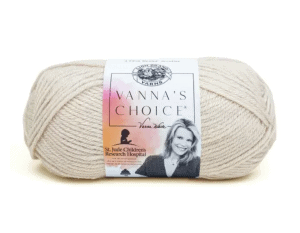
Fiber: 100% Acrylic
Yardage: 156m / 171 yds
Hook: 5.5 mm (I-9)
Substitute: Lion Brand Heartland

I decided to use some faux-fur keychains as my pom for the top of my hat, and all I had to do was remove the keychain part for it to be the perfect hat topper!

Puff Stitch Crochet Hat Pattern Stitches
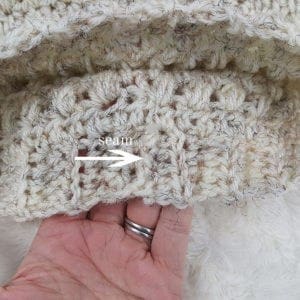
I started the pattern by crocheting the band with simple single crochets and half double crochets in the back loops to create the ridged look. I held the band together and sl st it together to make it one piece.
I then chained 1 and did 56 half double crochets evenly along the top of the band to start my main hat pattern.
I then used the puff stitch for the main part of this hat body. This pattern is for an intermediate crocheter because of the puff stitch, but if you are a beginner willing to try something a little harder than you should give this puff stitch beanie crochet pattern a try!
SELLING: You may sell items made from patterns on Easy Crochet unless otherwise stated. If you choose to sell items made from this pattern, please link it back to me at www.easycrochet.com for credit. Please do not use my pictures to sell your items.
IMAGES & CONTENT: The images and content of EasyCrochet.com are protected by copyright laws. Do not distribute or copy the content without written permission. Do not edit or remove watermarks from any original image from easycrochet.com. If you would like to share an image, please only use 1 with a link back to Easy Crochet. Thank you for respecting my work.
TRANSLATIONS: Please do not post a translation of my pattern(s) anywhere. If you would like to help make a translation I would be happy to publish it on Easy Crochet with a link and full credit to your blog. For further questions, please email krista@easycrochet.com.
Once you have read about the yarn and the stitches you’ll need to use for this crochet beanie, then you are about ready to get started! Next, you’ll need to scroll down to find the puff hat pattern in its entirety written in a women’s size.
Happy Crocheting!
How to Crochet a Puff Stitch Beanie
Skill Level: Intermediate
Materials
- Crochet hook size H 5.00 mm
- Less than a skein of Lion Brand Vanna’s Choice or any four weight yarn
- Faux fur pom poms or a Clover pom maker
- Yarn needle
- Scissors
Finished Size
- One size fits most adult women. 20″ circumference (unstretched) with a 9″ height
Crochet Abbreviations
- HDC – half double crochet
- PUFF – puff stitch (counts as 2 stitches in this pattern) yo, insert hook in indicated st, yo, pull up a loop, yo, insert hook into same st, yo, and draw up a loop (three times), yo and draw through all loops on hook, ch 1 to close.
- SL ST – slip stitch
- ST – stitch
- CH – chain
- SC – single crochet
- BL – back loop
Gauge
- Band: 1 row of HDC & SC in band = 1.25″ &1.5″ height
- Main Hat: approx. 8 ST’s for every 3″
Click here to read all about gauge and why it is important to follow.
The Pattern Steps
Band of The Puff Hat
Row 1: CH 6, in second CH from hook SC, SC across. (5)
Row 2: CH 1, turn, in first ST HDC BL, HDC BL in each ST across. (5)
Row 3: CH 1, turn, in first ST SC BL, SC BL in each ST across. (5)
Row 4-38: Repeat rows 2 & 3. (5)
Finishing the Band: Hold band together wrong side out ch 1, SL ST in each st along to connect. (see picture)
Main Puff Hat
Row 1: turn hat the right side out, CH 1, HDC 56 around the top of the band evenly, join with a SL ST to top of first HDC. (56) *2hdc’s in each hdc and 1 hdc for each sc in the band
Row 2: Next CH 2, PUFF in next ST, SK 1 ST, PUFF in next ST, repeat around ending with 1 SK ST, join with first SL ST to top of first PUFF(56)
Row 3: CH 1, starting in first ST HDC, HDC in each ST around, join with SL ST to top of first HDC (56)
Row 4- 11: Repeat rows 2 & 3. (56)
Row 12: CH 1, HDC in each ST around, SL ST to top of first HDC (56)
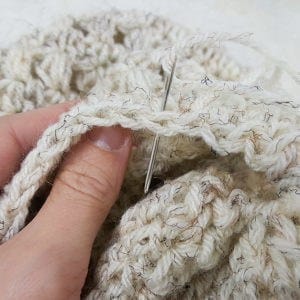
Row 13: CH 1, HDC in each ST around, SL ST to top of first HDC, (56) fasten off yarn leaving a 12 -15″ tail.
Finishing
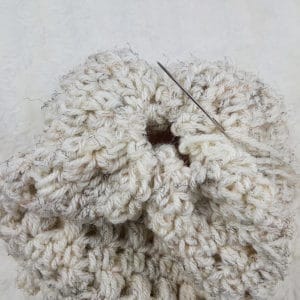
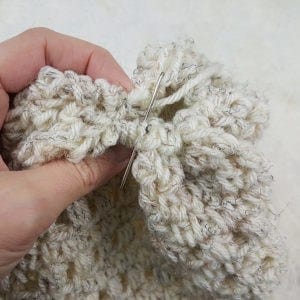
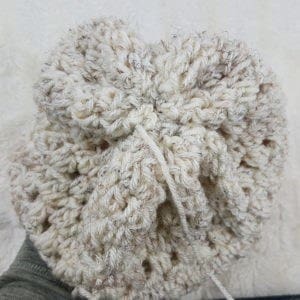
Attach yarn needle to 12-15″ tail, then weave the yarn tail through the top of each HDC from the previous round. Join together as shown in the pictures.
If your hat is turning out too small or too big, please double-check your gauge.
Adding Pom Poms
To complete your hat, you can now attach a pom of your choice if you chose to! I used some faux fur ones I found at a Michaels store near me. They were actually keychains but came with removable chains, so I was able to use the pom as a hat topper and the keychains can be used again later!
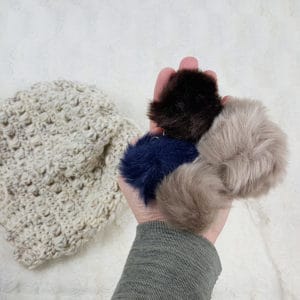
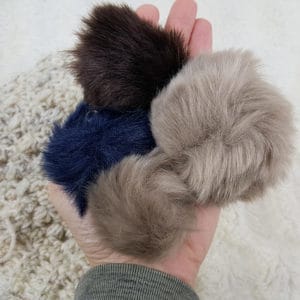


If you can’t find the faux fur poms, I suggest using a clover pom maker to make a yarn pom topper instead. They are super easy to use, and even my kids love making pom poms with them, which is why I have so many! 🙂
To attach the pom, use the leftover yarn end from the top of your hat to secure the pom-pom. Remember to weave in the yarn ends throughout the hat with a yarn needle, then you are finished with your pom hat!


Thank you for checking out this puff stitch beanie, and if you have any questions, please free to ask! Again, if you prefer an Ad-Free PDF of this pattern that can be found in my shop (coming soon!).
Thank you for supporting my family, me and my small business. 🙂
You May Also Like These Free Hat Crochet Patterns
- 15 Free Crochet Bandana Patterns for all Skill Levels
- 14 Free Crochet Beret Patterns
- Neon Rainbow Striped Crochet Hat
- 7 Easy-to-Follow Slouchy Hat Crochet Patterns You’ll Love
- Chunky Crochet Ear Warmer Pattern
- Bernat Yarn Scrunchie Crochet Pattern
- Crochet Twist Headband Pattern
- Crochet Face Mask Pattern Covers
I love this pattern! I made the hat for my daughter.
Thanks!
I am so glad you liked it, and you are welcome!
Happy Crocheting.
Krista
clarification, as i am an advanced beginner (i did your unicorn scarf!) — you say 56 stitches evenly spaced (main hat, row 1)– so i need to stitch 2 HDC in the same spaces sometimes around to make 56? bec there are only 38 stitches/rows from the band, right?
for row 2 of main hat, 56 HDC but that means 2 HDC in each puff stitch?
Thanks! might make this to match the unicorn scarf for my 11 year old..
Hi,
For the first row of the hat you will need 1 hdc for each sc and 2 hdc’s for each hdc of the band for a total of 56 hdc’s.
If you have any more questions please feel free to ask.
Krista