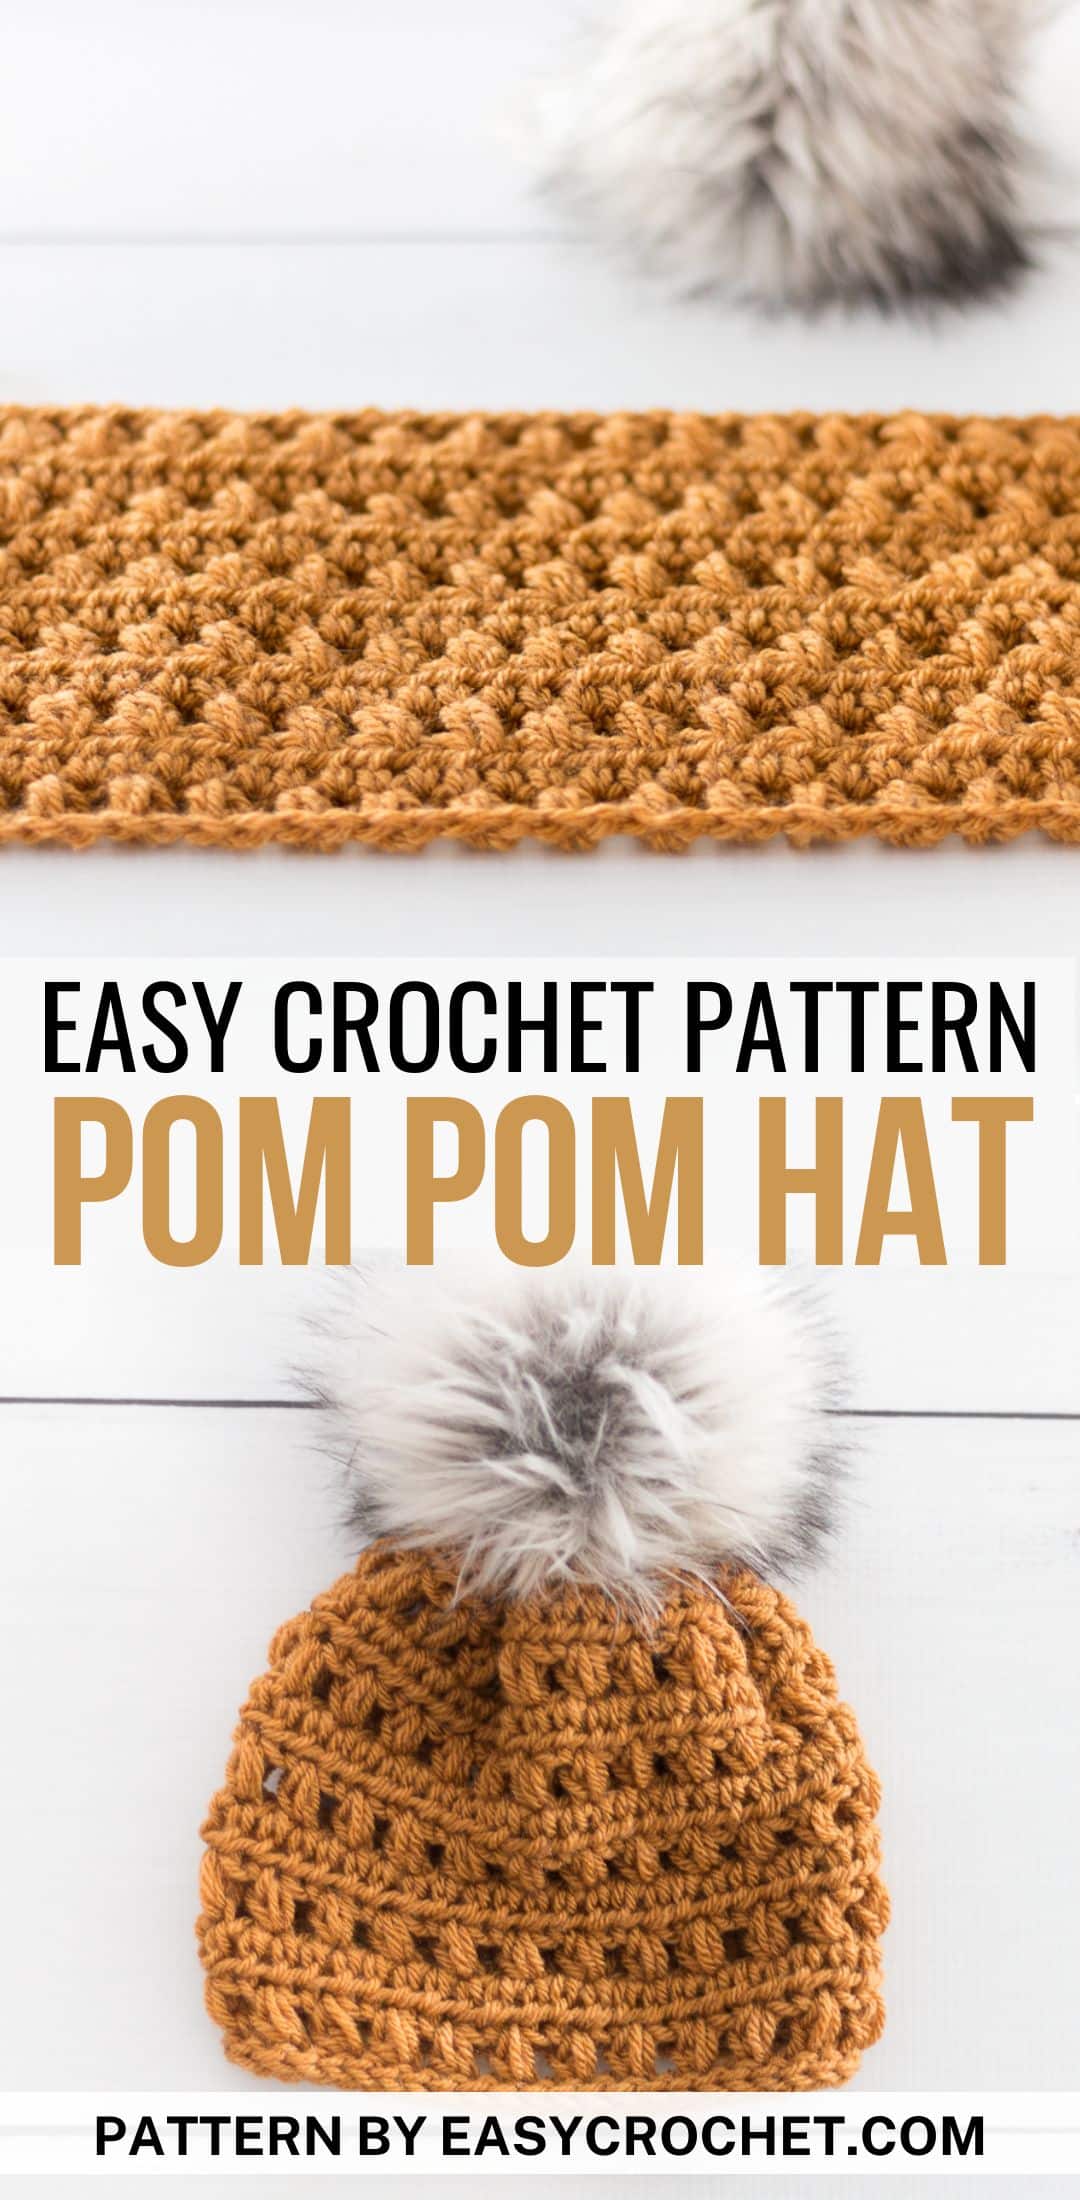
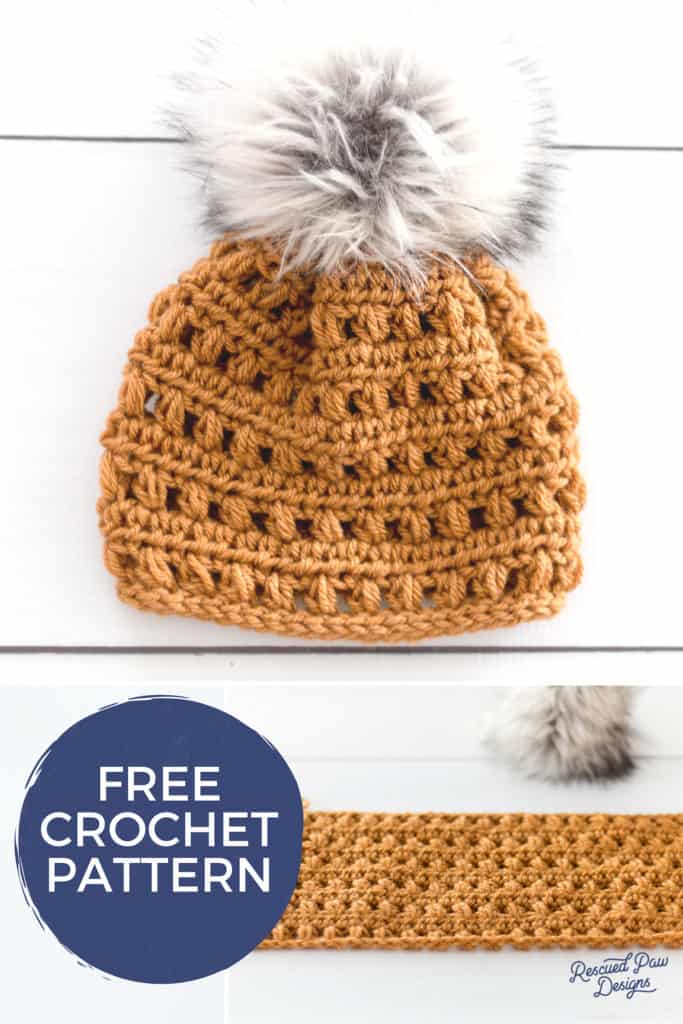
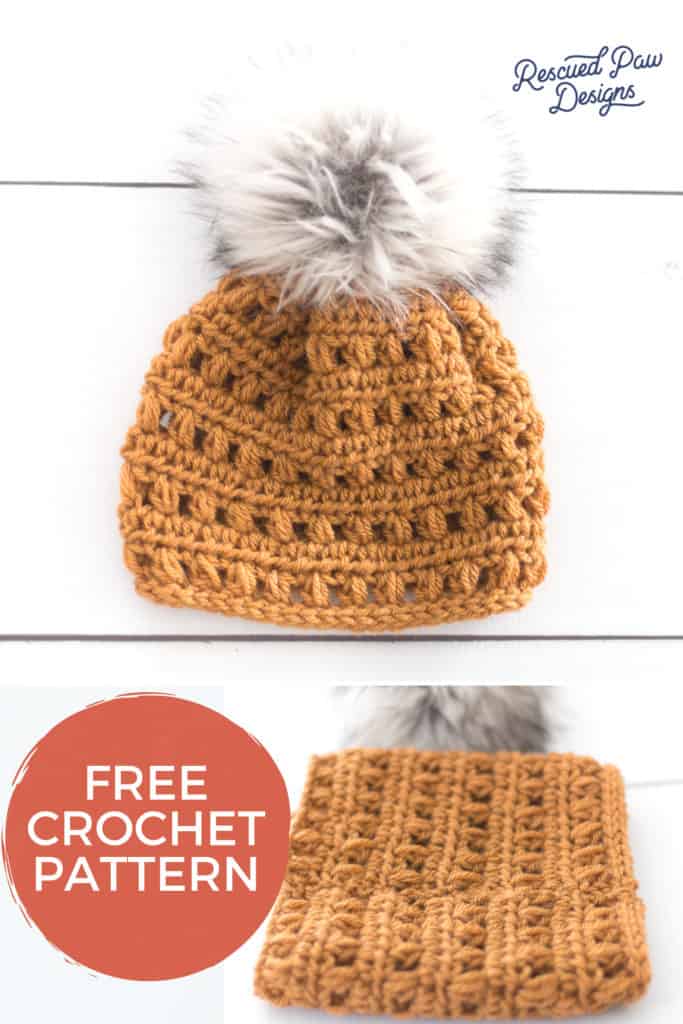
Crochet Beanie Hat with Pom Pom (Free Pattern)
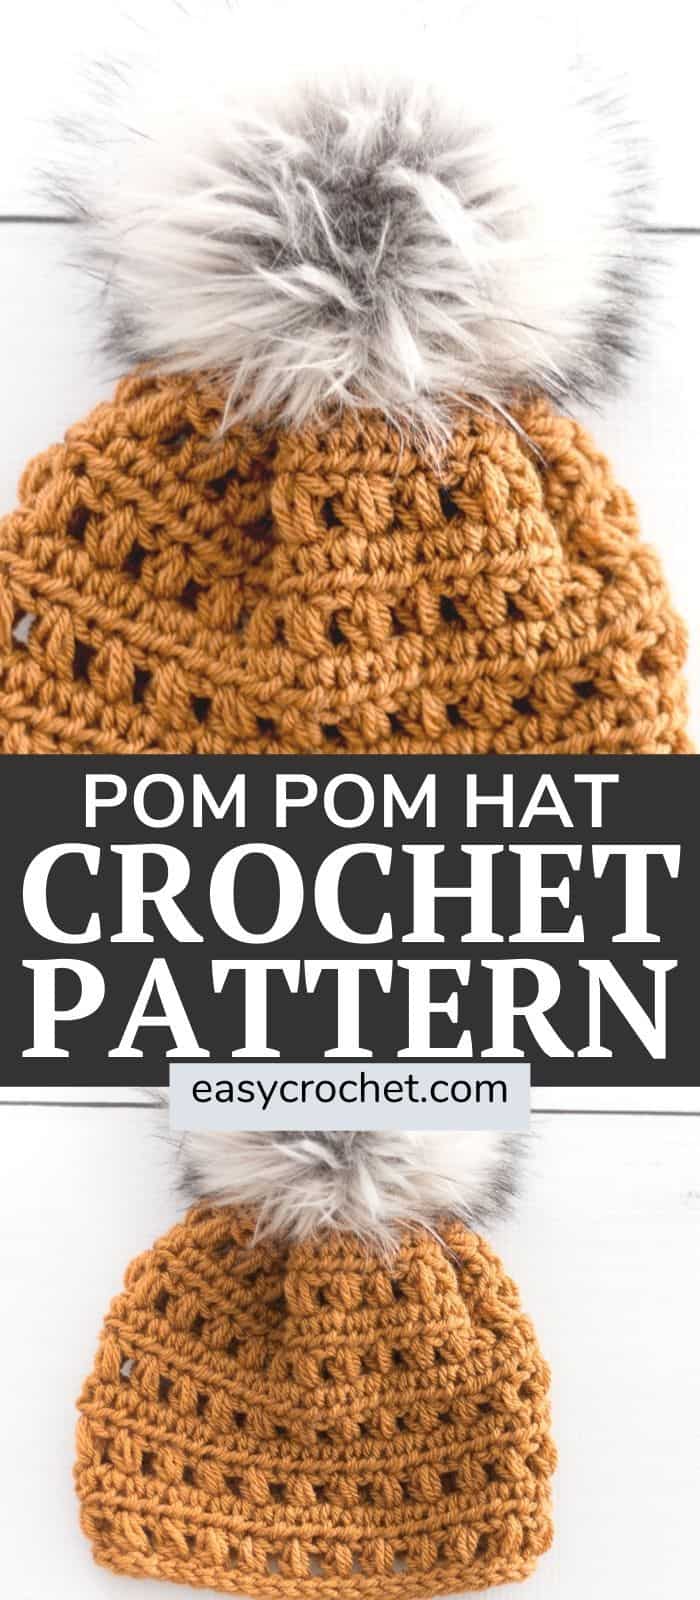
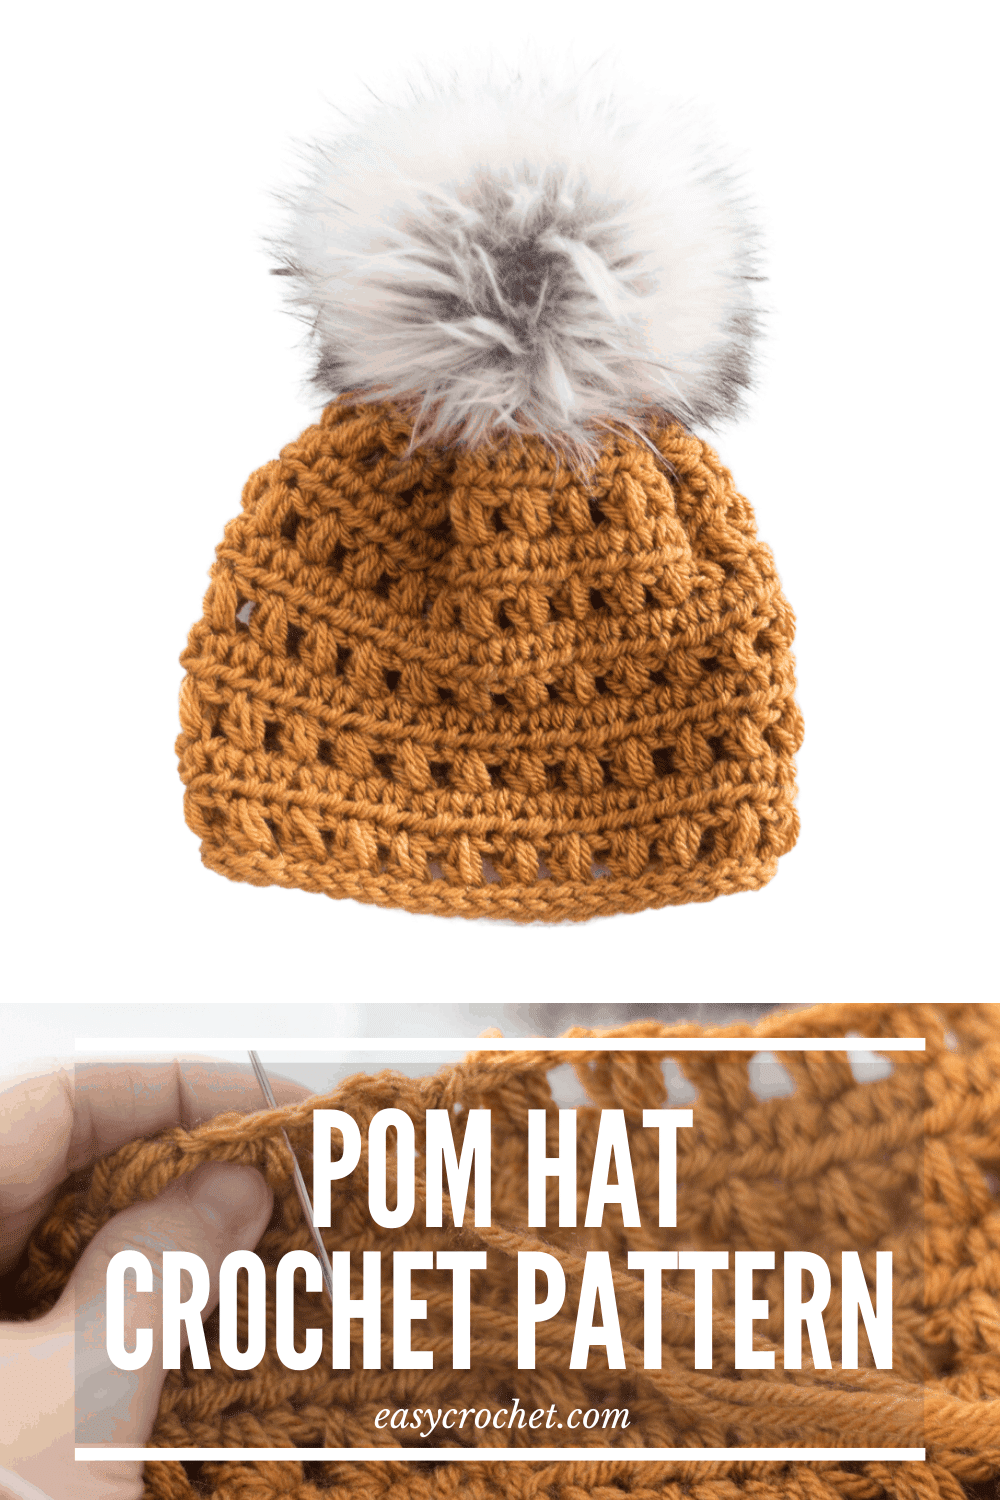
Use this free crochet beanie pattern to create a fun & unique pom hat design! After you read through the instructions, you will easily be able to make your very own crochet beanie hat with a faux fur pom. Promise!
Scroll on down to find the full free hat pattern here on the blog, or you can purchase the AD-free PDF if you prefer. Either way, happy crocheting!
Happy Hat Making!
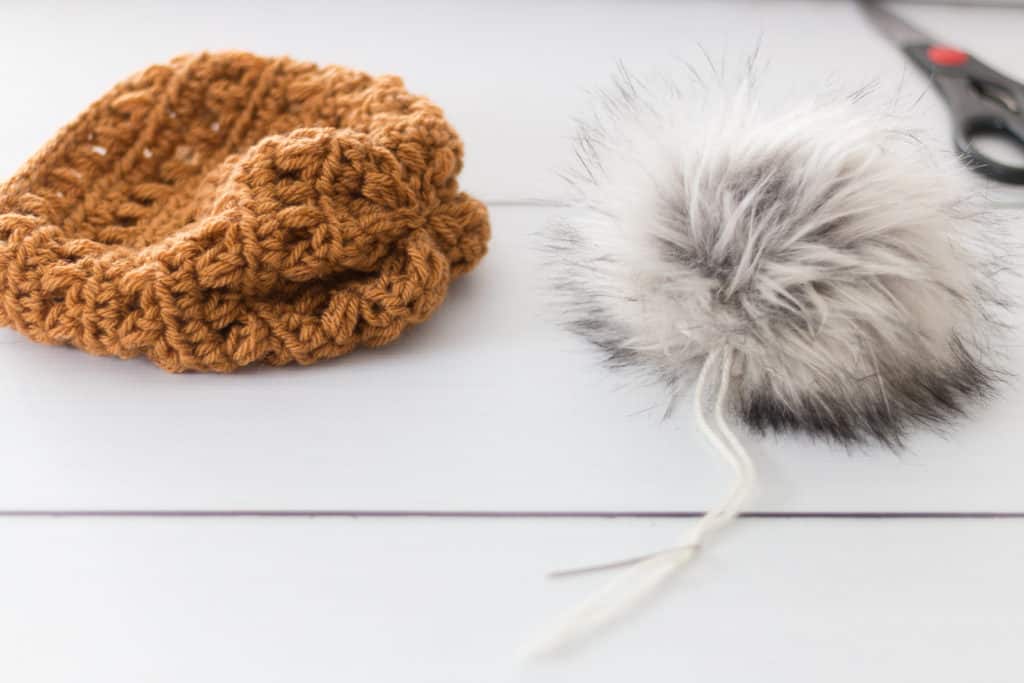
Faux Fur Pom Vs Traditional Yarn Poms
If you have noticed online lately, there has been a trend of crocheting hats with faux fur poms on them instead of the traditional yarn pom. This trend is not going away anytime soon, so I decided to throw my pattern into the mix!
If you’d like to learn how to make a beanie with one of these pom poms and learn where to find good quality poms online, then I can help! Read on down to find out how to crochet a hat with a pom-pom!
The Yarn That’s Perfect for This Crochet Beanie Pattern
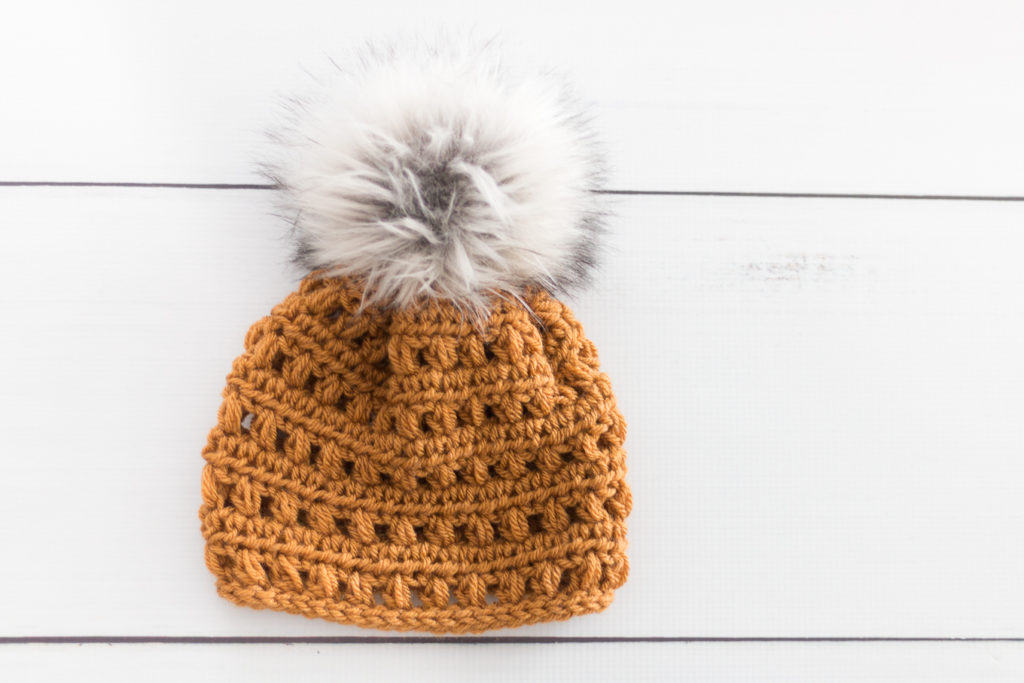
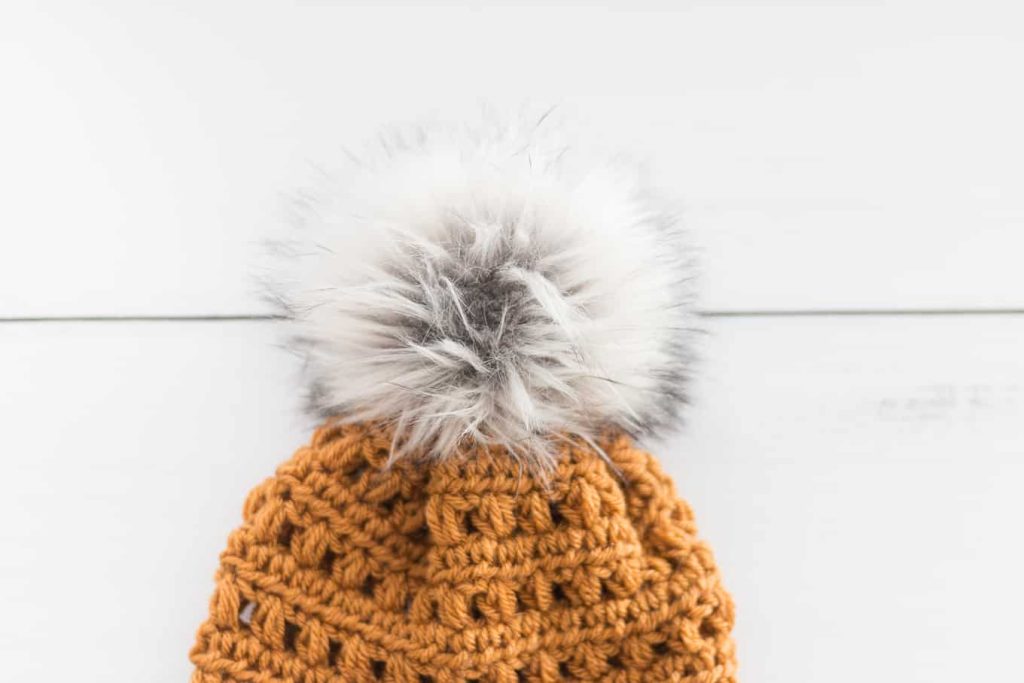
For my faux fur pom hat, I decided to use Lion Brand Yarns Vanna’s Choice in a pretty honey mustard color! Just like these fur poms, the color mustard is very in right now, so why not combine the two to make a beautiful crochet beanie!
Vanna’s is a medium weight 4 yarn that is available in many colors and styles, so you’ll be able to make this easy crochet hat unique to you. Be sure to check this yarn out when you get a chance.

If you haven’t tried Vanna’s Choice, then you are missing out because there are so many great colors to choose from, and it is super durable. I can attest to this because I have three kids who put my crochet designs through the wringer.

The Faux Fur Pom Poms
I have tried quite a bit of different pom-poms over the past year, but my favorite is from a small business owner Pineapple Lane Crafts who I found on Etsy! She makes incredible quality poms at a reasonable price!
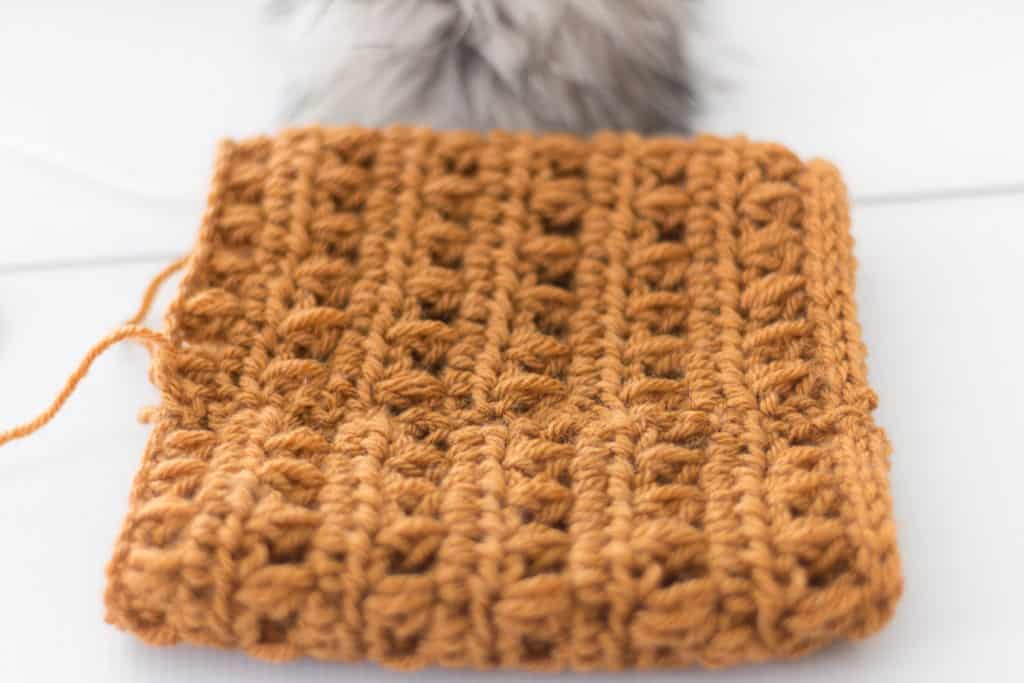
This Simple Beanie Is Worked in Rows Instead of Rounds!
A pom crochet hat like this is a little different from some of my other designs as it is worked in rows instead of in the round!
This way of crocheting a beanie is great for a beginner crochet level, and it works up quickly!
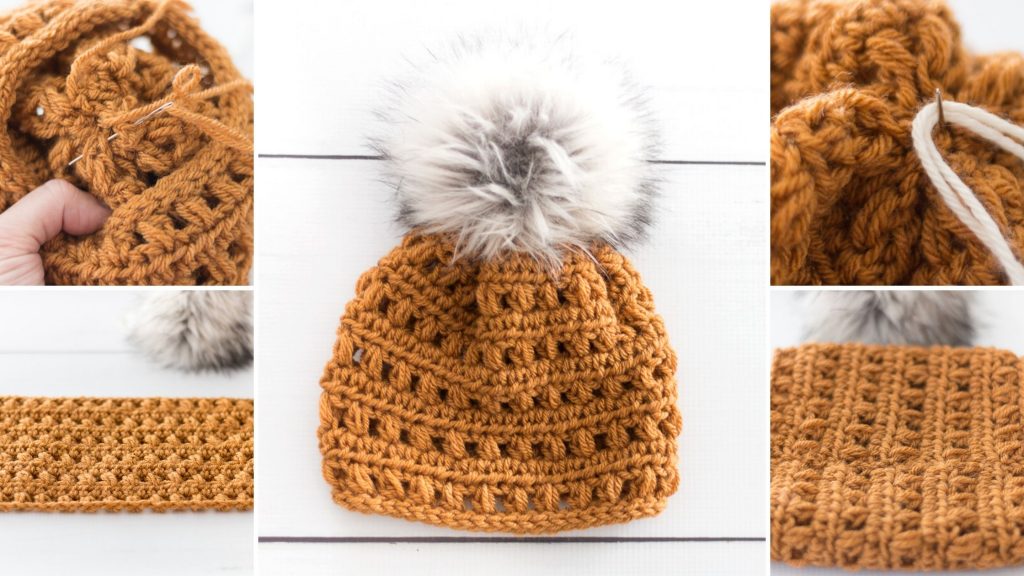
After you finish all the rows, you will need to sew up the side and the top with a yarn needle. Next, add the handmade pom I talked about earlier as the perfect topper to this hat!
Ready to Get Started on Your Fur Pom Hat?
Read on down to find the full pattern, material list, and notes on how to make this fun and easy crochet pom hat.
A printable PDF with all FIVE sizes can be found in my shop Easy Crochet for the price of a fancy coffee.
Otherwise, keep on scrolling down to find the free beanie pattern down below here on the blog.
Free Crochet Hat Pattern With Pom
Description: This simple crochet hat is perfect for all levels of crocheters, and the added touch of the pom gives it the perfect final touch.
Skill Level: Intermediate
Materials
- 1 skein of Lion Brand Vanna’s Choice in Honey
- Crochet hook size H 5 mm
- Yarn needle
- Scissors
- Fur Pom

Abbreviations
- Puff = puff stitch (yo, insert hook in indicated st, yo, pull up a loop, yo, insert hook into same st, yo, and draw up a loop (three times), yo and draw through all loops on hook, ch 1 to close)
- st = stitch
- sk = skip
- ch = chain
- dc = double crochet
- sl st = slip stitch
Gauge
4 stitches = approximately 1.25″
Gauge is important for proper sizing. If the gauge is not followed then it will result in a hat that is too small or too big. Please take care and follow the gauge. Find out why gauge is important.
Notes
Written in Standard US terms
Sizing
Sizes are written for a baby with additional sizes below.
Finished Sizes:
The finished sizes are as follows when the correct gauge is followed. It’s important guys!
- Baby: Circumference 14″ Height 7″
- Toddler: Circumference 16″ Height 7.5″
- Child: Circumference 18″ Height 8.5
- Woman: Circumference 21″ Height 8.5″
- Man: Circumference 23″ Height 9″
Pattern Steps
To Start: Ch 48 (56, 64, 72, 80)
Row 1 (Foundation Row): In the 4th chain from the hook puff, *sk a ch, puff, repeat from * across until you are left with 2 chs, sk a st and make a dc in the last chain, turn. (45)(53)(61)(69)(77)
Row 2: Ch 1, starting in the first st hdc, hdc in every st across, turn.
(45)(53)(61)(69)(77)
Row 3: Ch 3, in the first st puff, *sk a st, puff, repeat from * across until you are left with 2 st’s, sk a st and make a dc in the last st, turn.
(45)(53)(61)(69)(77)
For the rest of the pattern follow the steps below…
Baby:
- Repeat row 2 + 3 until you reach row 11. Turn.
- Ch 1, sl st in the back loop of every st, turn. (45)
- Ch 1, sl st in the back loop of every st. (45)
- Follow the finishing directions below
Toddler:
- Repeat row 2 + 3 until you reach row 13. Turn.
- Ch 1, sl st in the back loop of every st, turn. (53)
- Ch 1, sl st in the back loop of every st. (53)
- Follow the finishing directions below
Child:
- Repeat row 2 + 3 until you reach row 15. Turn.
- Ch 1, sl st in the back loop of every st, turn. (61)
- Ch 1, sl st in the back loop of every st. (61)
- Follow the finishing directions below
Woman:
- Repeat row 2 + 3 until you reach row 17. Turn.
- Ch 1, sl st in the back loop of every st, turn. (69)
- Ch 1, sl st in the back loop of every st. (69)
- Follow the finishing directions below
Man:
- Repeat row 2 + 3 until you reach row 19. Turn.
- Ch 1, sl st in the back loop of every st, turn. (77)
- Ch 1, sl st in the back loop of every st. (77)
- Follow the finishing directions below
Finishing
Follow the step by step instructions below to finish off your new crochet hat pattern!
After the last row of sl st’s in the back loop fasten off the yarn taking care to leave a 15-20 inch piece of yarn (depending on the size you have decided to make!)
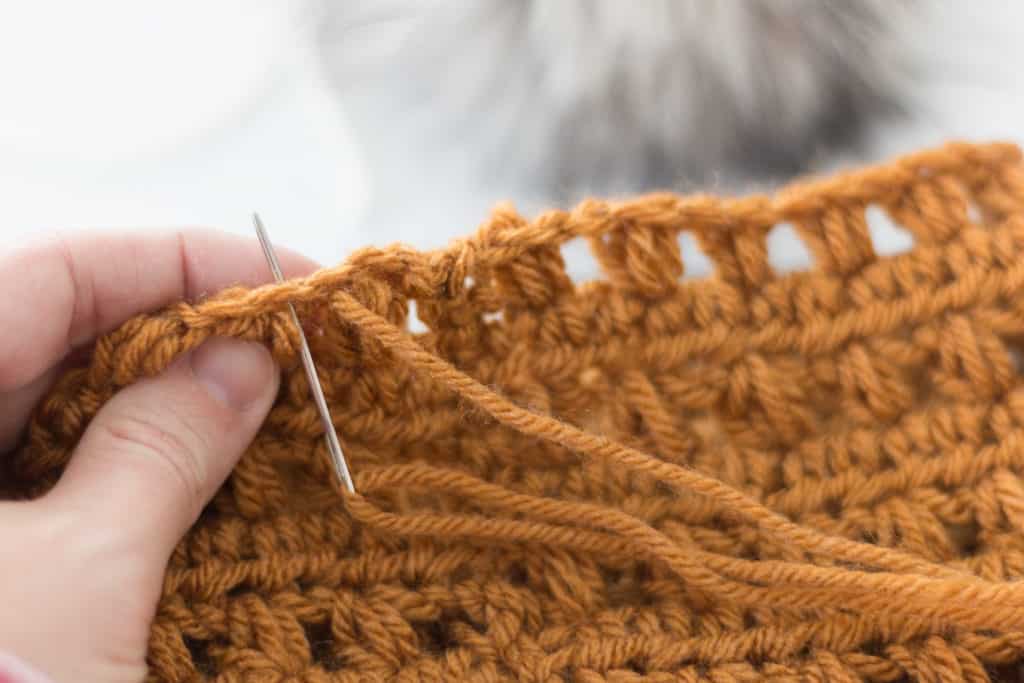
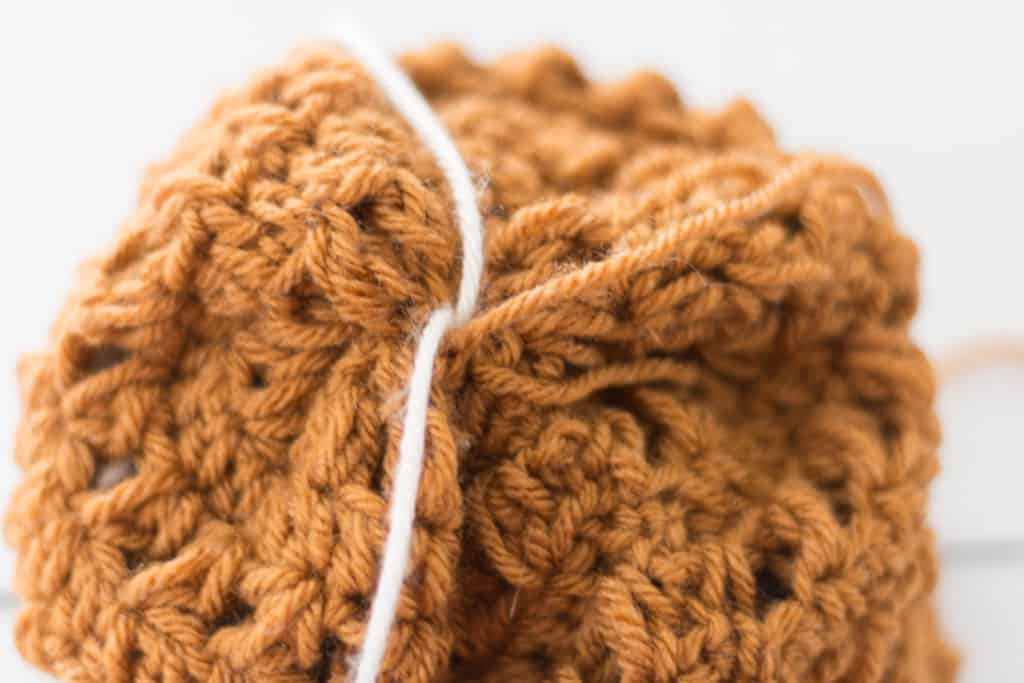
With a yarn needle, use the mattress stitch seam the short sides of the hat together, as shown below.
If you’d like to freshen up your mattress stitch skills, then check out this post about “How to do the mattress stitch in crochet.”

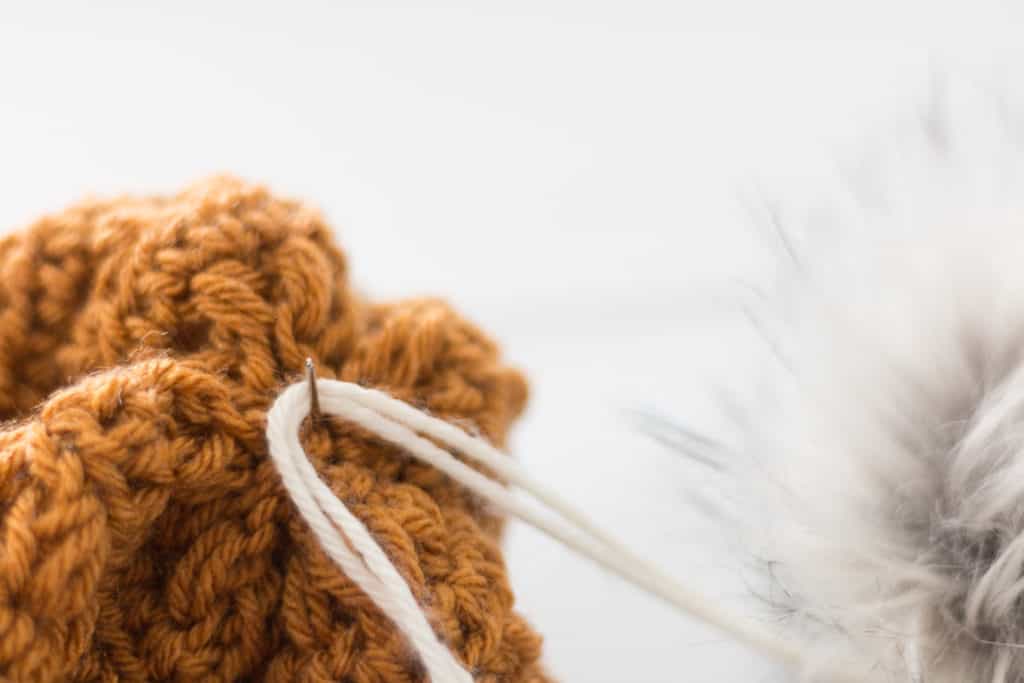
Once you have reached the top of the hat, you will still be using the extra tail of yarn from before to close off the top of the hat by weaving around the edges. Once you have made one circle around, you will pull the wool tight and pull your yarn needle down the center of the hat. I then suggest weaving in the tail end once again along the inside as shown below on the inside of the beanie. Leave that tail end there with a 4-inch tail. Trim if necessary.
See pics below on how to close off the hat.
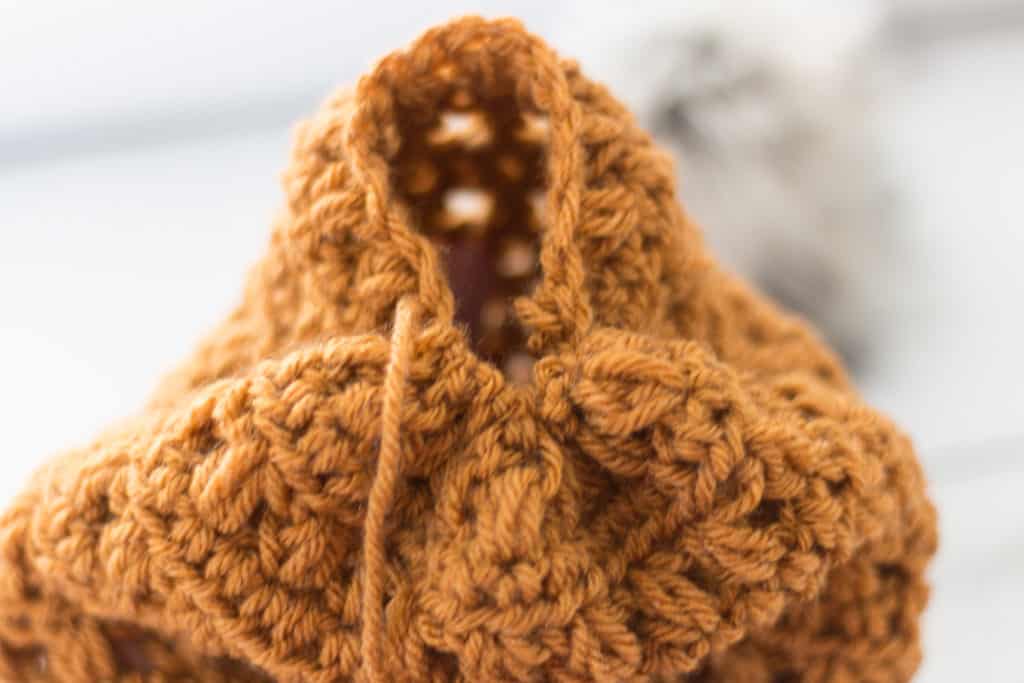
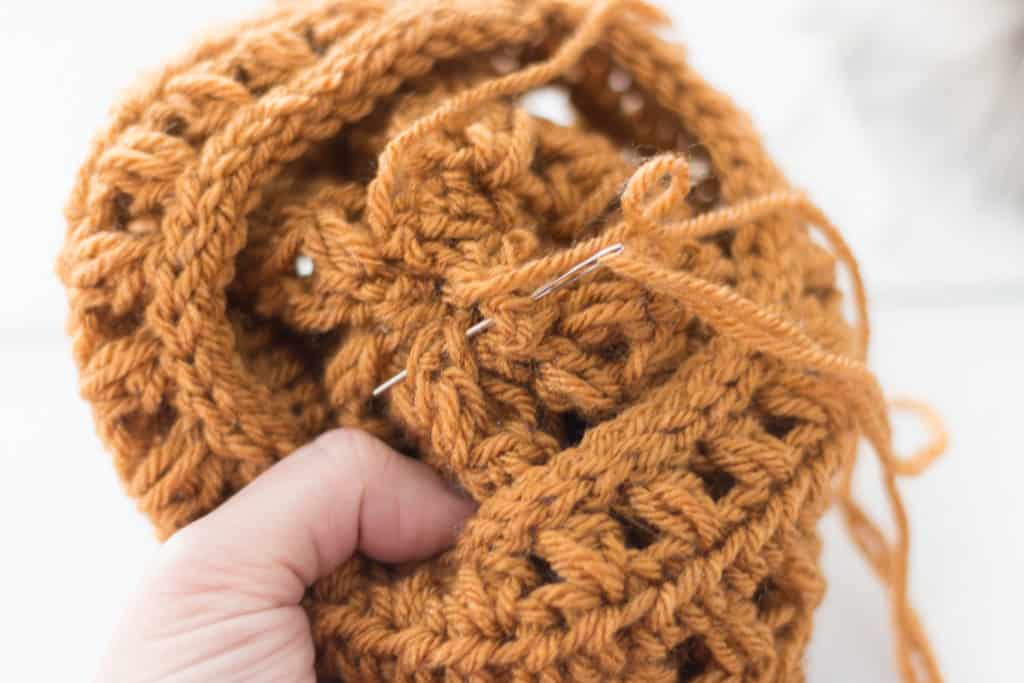
How to attach a pom pom to a hat:
You will attach the yarn needle to the yarn that is attached to the fur pom (you can find where I got mine below in the blue box!) Pull through the center of the hat. Turn the cap inside out. Pull the 4-inch yarn tail in between the two yarn ends from the pom and tie to secure. Do this as many times as you feel necessary and then if you want extra assurance that the pom will stay weave in those tail ends throughout the hat.
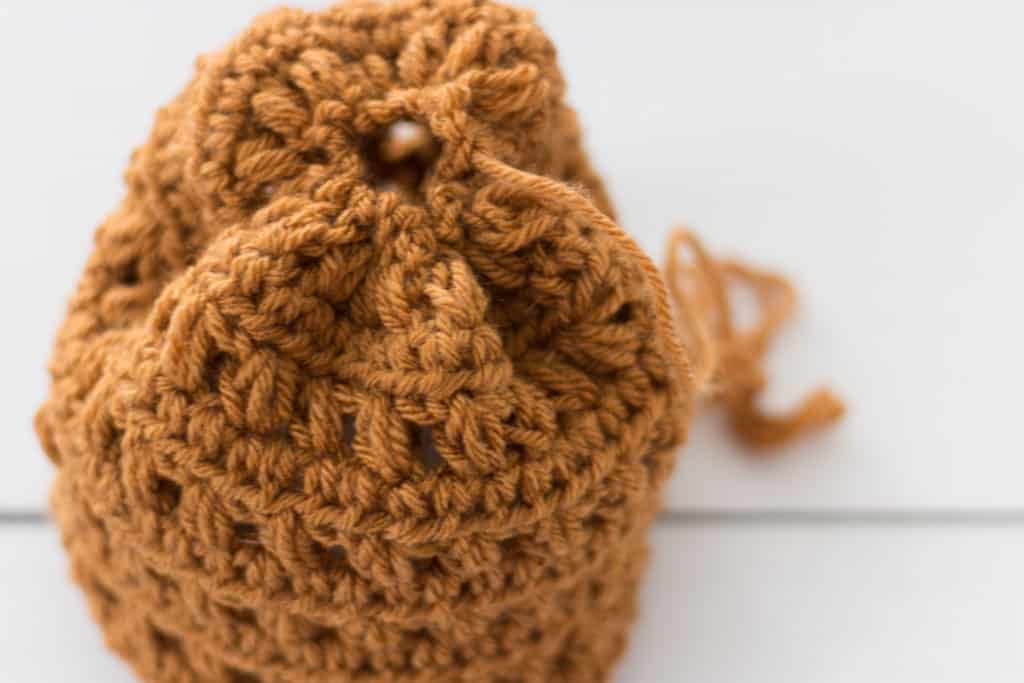
Attach the pom (which is so fun to add and oh so pretty) as shown below.
Finish up by weaving in ends throughout the hat with the yarn needle.
You are done!

More Winter Hats to Keep You Warm.
If you love crocheting hats or live in a COLD place like me… (Pennsylvania) then you will probably need more than one hat to keep you warm.
Winter hats or headbands are a must-have for me, like the snowy crochet ear warmer below.
You could also explore the Easy Crochet free crochet hat archive if you are looking for something different too.
Thank you so much for this pattern, so cute and easy.
You are welcome, Kellie!
Hi!
I am getting confused with the Puff Stitch – do I YO and go into the stitch 3 times? There are only 2 times in the description. Newbie here and easily confused with stitches… 😉 Thank you! Hat is so adorable!
Hi Dianna,
I checked the description for the pattern and it says
Puff = puff stitch (yo, insert hook in indicated st, yo, pull up a loop, yo, insert hook into same st, yo, and draw up a loop (three times), yo and draw through all loops on hook, ch 1 to close)
I am not sure where it says 2 times. If it does say that anywhere I’d love to fix it!
Krista
Am I missing something or there’s not a specific row 4? I’m assuming it’s like row 2 you just hdc… but fun pattern so far! ☺️
Hi, I am trying to make this hat, I chained 72, then I did the puff stitch then skip a stitch then repeat across, this does not end up with 69 stitches.. if you are skipping a stitch that is going cut the stitches about in half.. am I supposed to chain one in between the puff stitches..? Thanks Kim
Hi Kimberly. The puff stitch closes off with a ch 1. So even though you are skipping stitches. the ch 1 of the puff makes up for it. 🙂 Happy Crocheting!
I’ve been watching your IG, waiting for you to publish this one. Think I’ll whip one today!