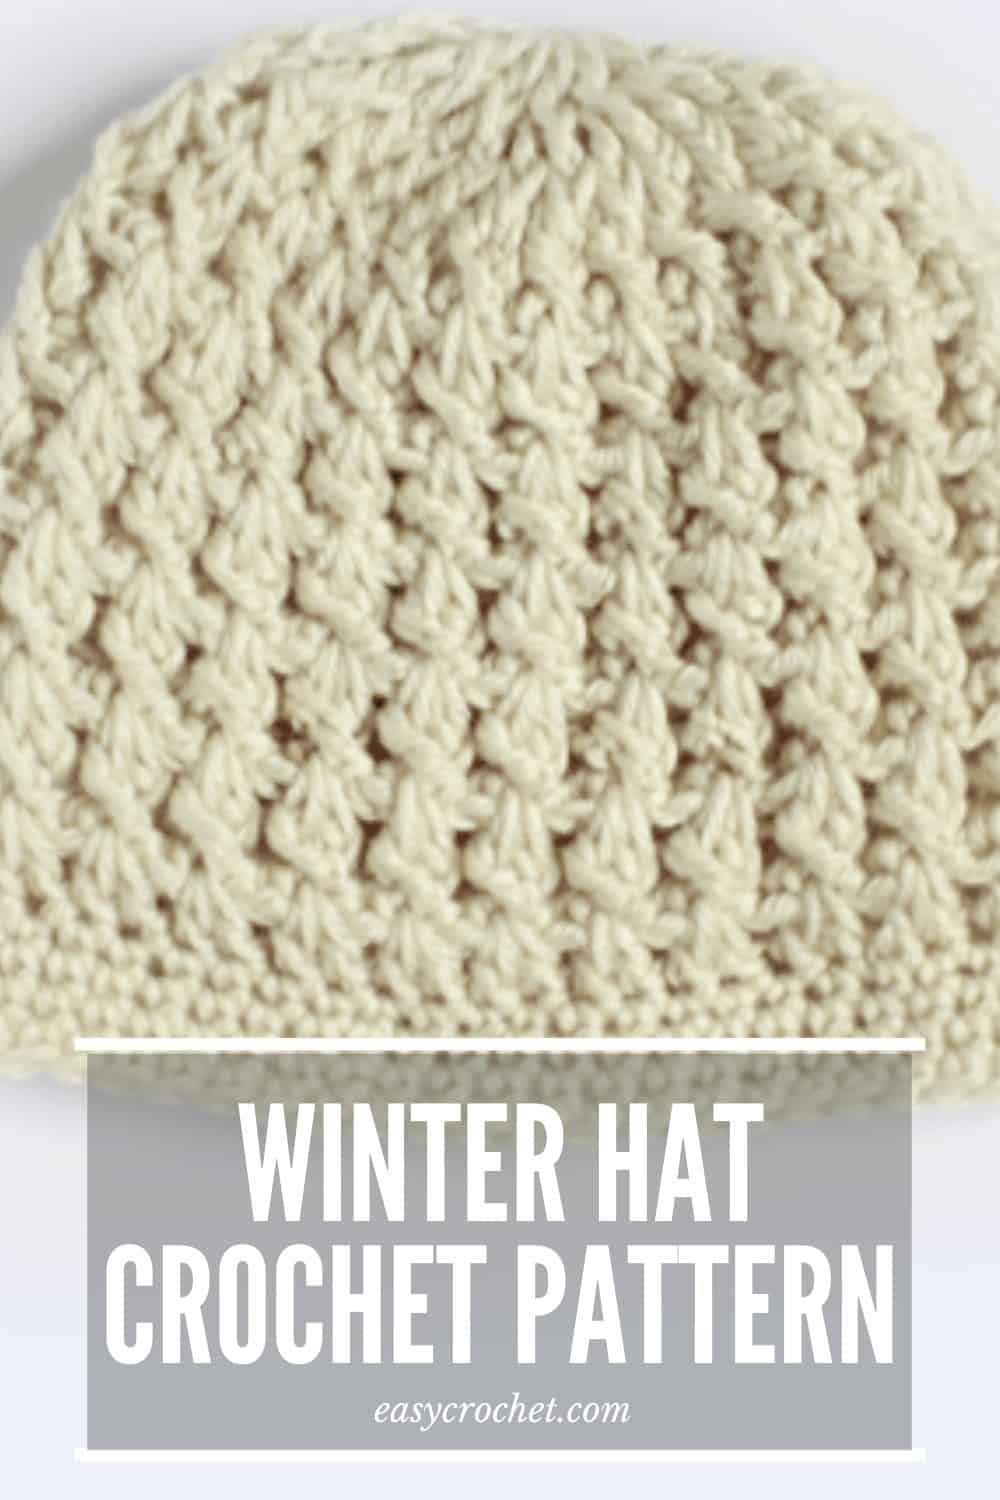
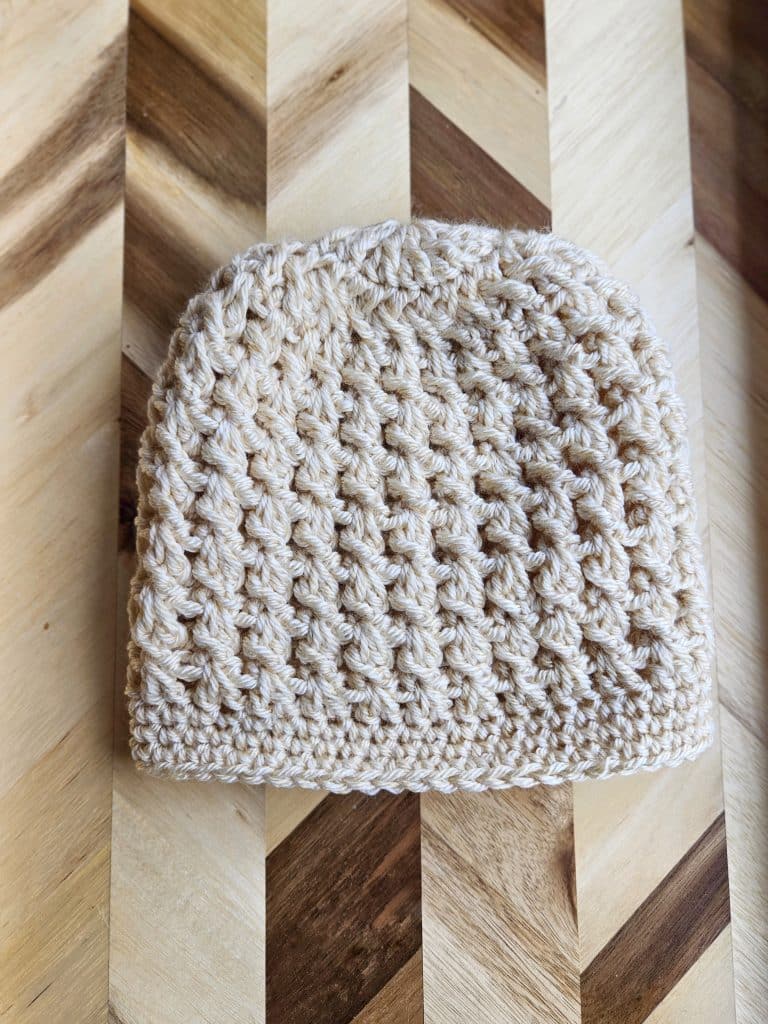
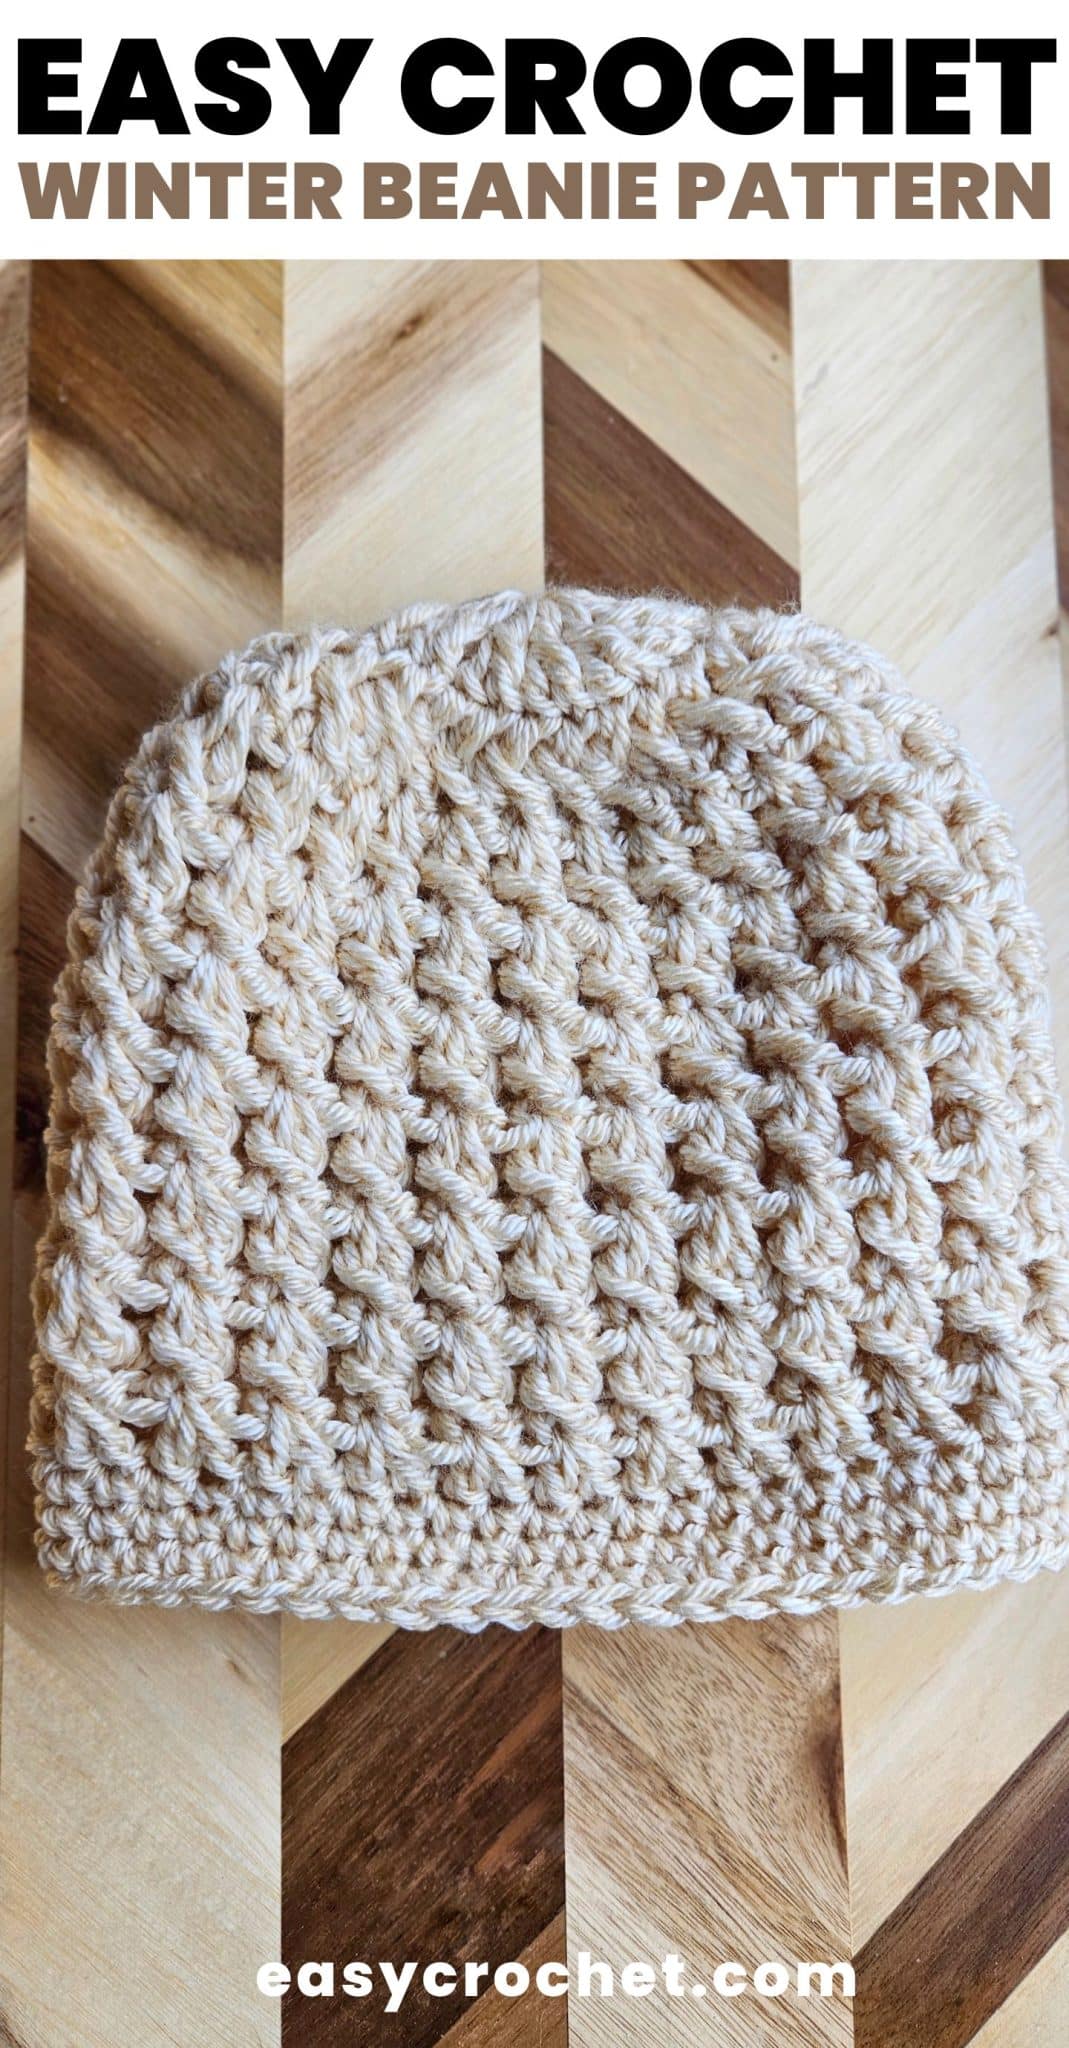
Winter Crochet Beanie Pattern
If you are looking for a quick hat pattern that is perfect for winter, then beanie pattern is for you!
I decided to name this latest design the Dreaming of Winter Crochet Beanie after my constant need to want to make all the things for the cool weather that inevitably happens every year here in Pennsylvania.
As a crocheter, I am already dreaming of winter and all the hat patterns I can create with my ever-growing yarn stash. When the cool weather hits, it gets me in the mood to buy all the yarn! Can you relate? Lol.
Read on down to find the FREE winter crochet beanie pattern and learn a bit about the yarn I used!
How to Crochet a Winter Beanie
Learn all about the yarn and the stitches you’ll need to know to be able to crochet the winter beanie as shown.
The Yarn
This pattern is written to work well with Lion Brand Heartland yarn, which is very “soft” to work with. It has a nice flow over a hook and doesn’t get caught or snag (in my opinion).
Heartland is a 100% acrylic yarn and easy to find in most local craft stores, Walmart and online. Let’s not forget about the 30+ colors and styles this yarn is available in, which means you can truly make this hat your own.

You could use a different yarn if you prefer and get the same results as long as the weight and gauge is similar. I suggest trying Vanna’s Choice by Lion Brand Yarn or Caron Simply Soft by Yarnspirations. Both are good choices and a good match as a substitution in terms of yarn weight.
If you’d like to take a look at this yarn in a bigger project, I can help you there. I have used it in the past to make a blanket like my Finley Blanket design or Falling in Blanket.
The Stitches
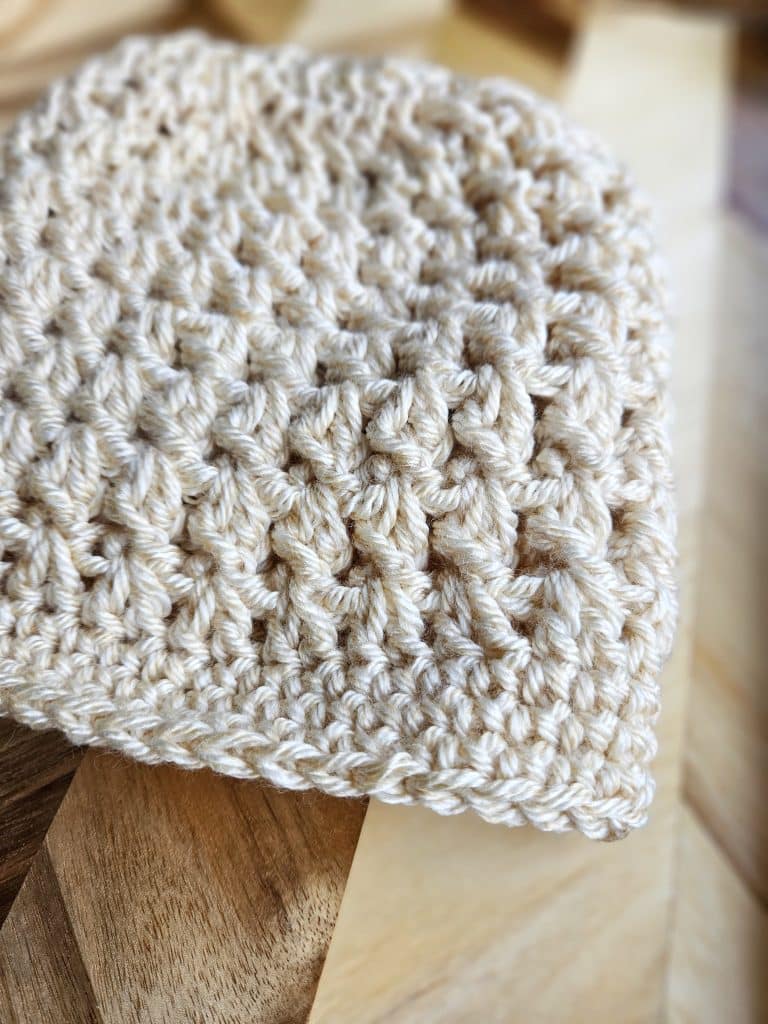
This particular design has a lot of texture versus a typical hdc or dc beanie pattern, which makes it a fun alternative to the norm. We will be using a front post double crochet (fpdc) mixed with double crochets to create a unique hat design that looks harder than it is to make.
Learn more about these and the other crochet stitches used below.
- Double Crochet (dc)
- Front Post Double Crochet (fpdc)
- Single Crochet (sc)
- Slip Stitch (sl st)
- Chain (ch)
I promise, you can do this! If you’d like some extra help with the fpdc I linked up a tutorial above. That’s enough chit-chat! I hope you love the free Dreaming of Winter Crochet Beanie Pattern! Read on down for the free pattern and picture tutorial.
Enjoy!
The Winter Beanie Pattern
Skill Level: Intermediate
Materials
- Lion Brand Heartland Yarn in the color Acadia – approximately 125 yards or any medium weight four yarn (aka worsted weight yarn)
- I 5.5 mm crochet hook size
- Yarn needle
- Scissors
- Measuring tape
Notes
- You MAY sell items made from this pattern. If you choose to sell items made from any of my patterns, please link back to me at easycrochet.com for credit. Do not use my photos to sell any items. Thank you for respecting my work.
- Finished beanie size: 8″ length and 20″ circumference (but easily stretches if needed)
- Ch 3’s do NOT count as a stitch
Crochet Abbreviations
- ch = chain
- dc = double crochet
- sc = single crochet
- sl st = slip stitch
- st = stitch
- fpdc = front post double crochet
- sk = skip
Dreaming of Winter Crochet Beanie Pattern
by Easy Crochet
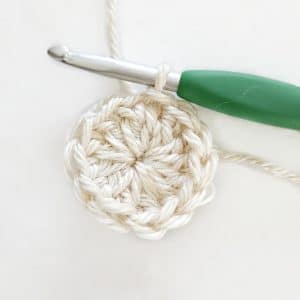
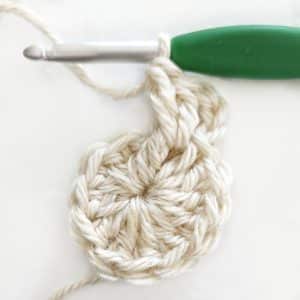
Round 1: ch 3, 12 dc in 3rd ch from hook, sl st to top of first dc. (12)
Round 2: ch 3, * 2 fpdc’s around first dc from previous round, repeat from * around, sl st to top of first fpdc. (24)
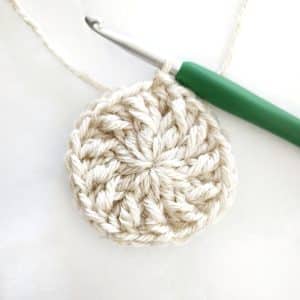
Round 3: ch 3, *dc, fpdc around same st as dc, repeat from * around, sl st to top of first dc. (48)
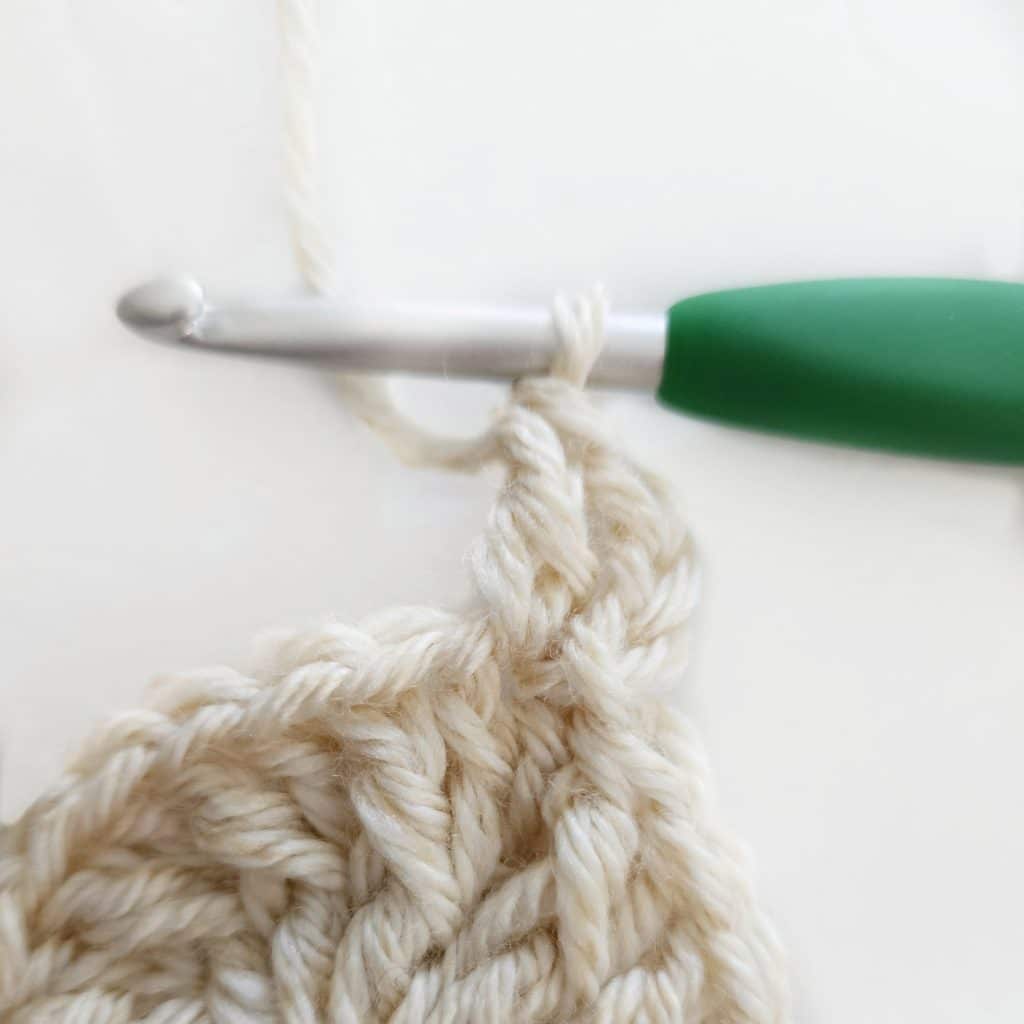
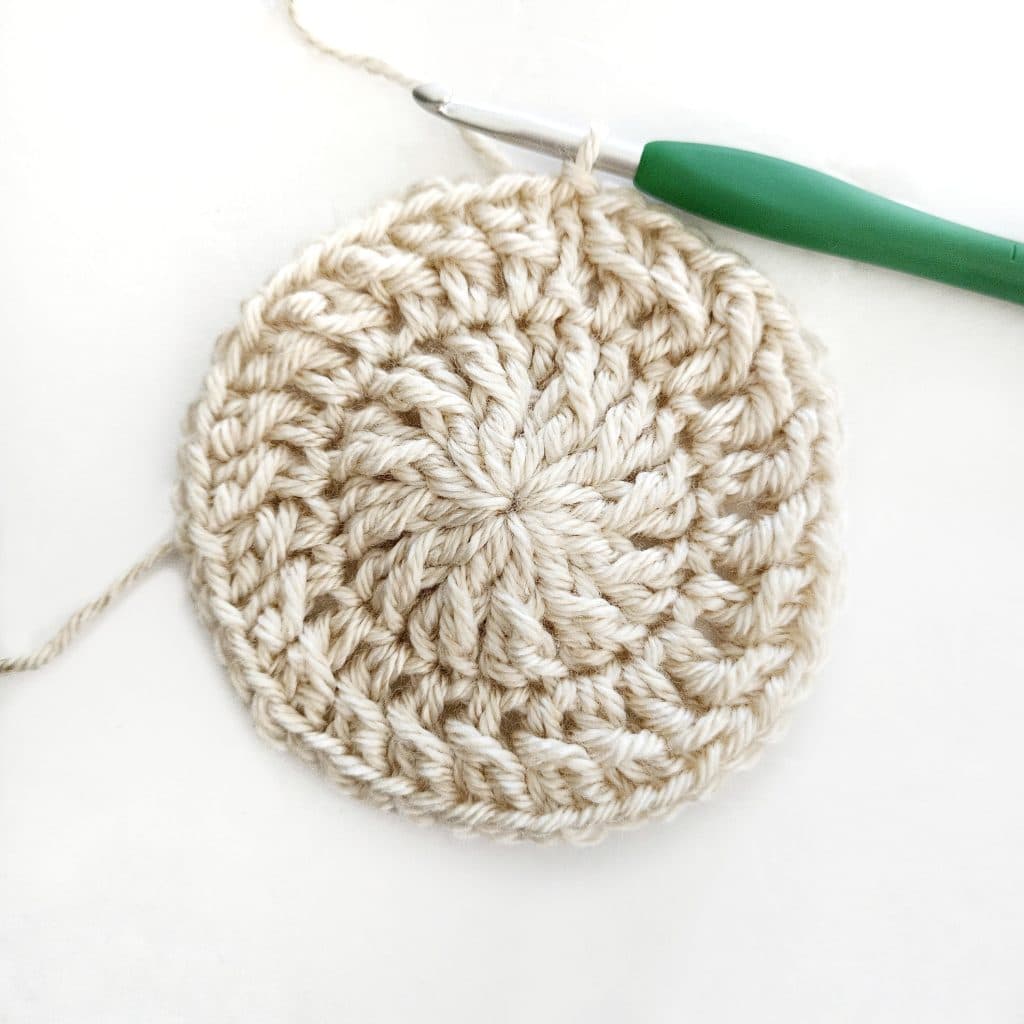
Round 4: ch 3, sk the first st, fpdc around the next st, go back to the skip st and fpdc (forms a crisscross), *sk a st, fpdc around the next st, go back to sk st and fpdc around that st, repeat from * around, ending with a fpdc around the ch 3 from the previous round and finish with a fpdc around the last st of the round, sl st to top of first st.
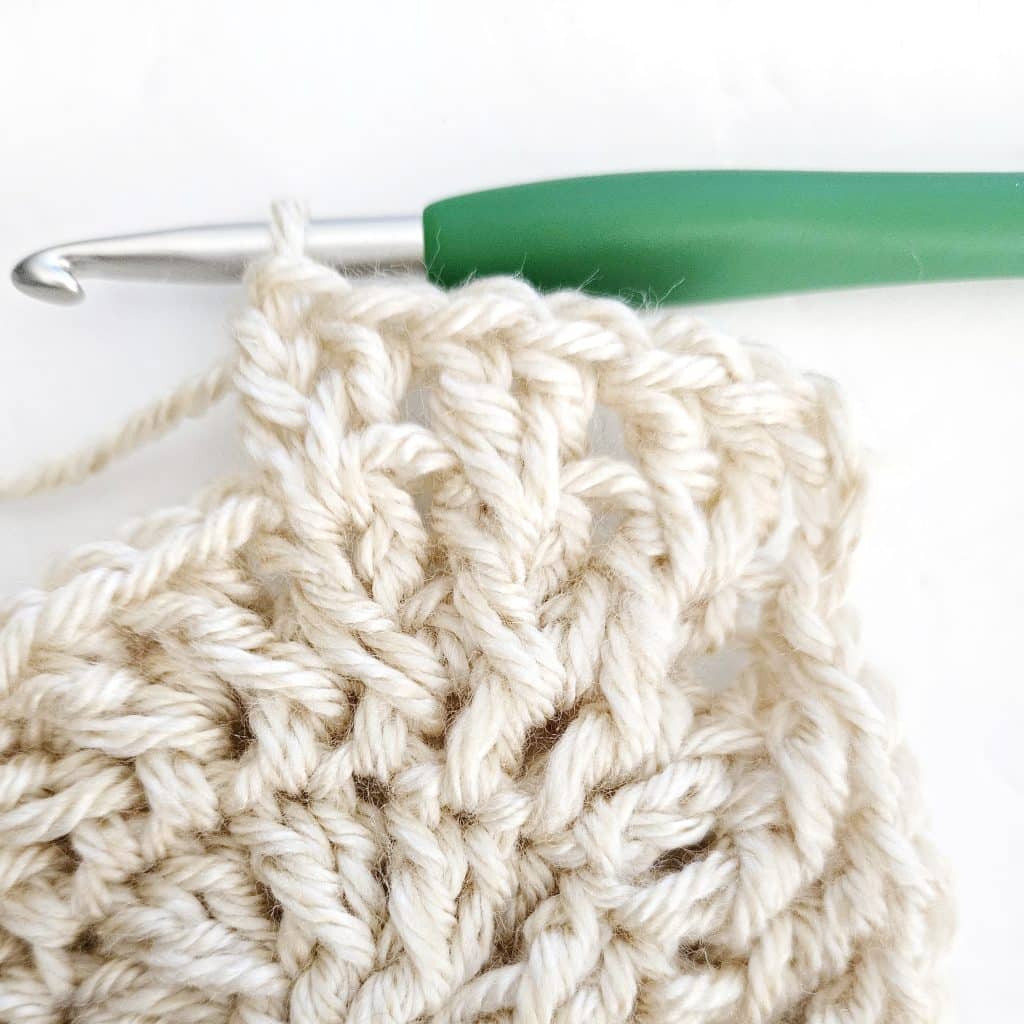
Round 5: ch 3, dc 2 times in between criss cross and every criss cross around, sl st to top of first dc.
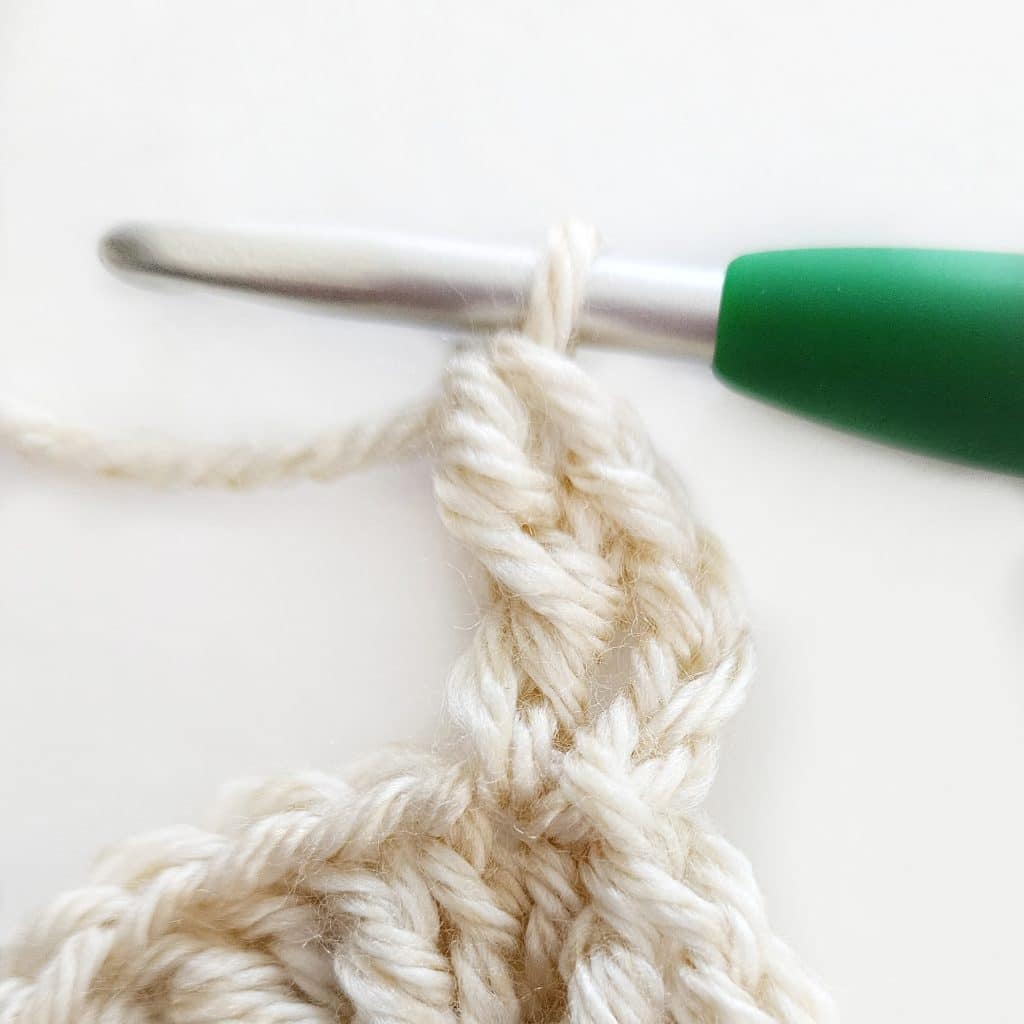
Round 6: ch 3, sk the firs st, fpdc around the next, go back to the sk st and fpdc * sk a st, fpdc around the next st, go back to sk st and fpdc around that st, repeat from * around end with a sl st to the top of the first st.
Round 7-16: alternate round 5 & 6
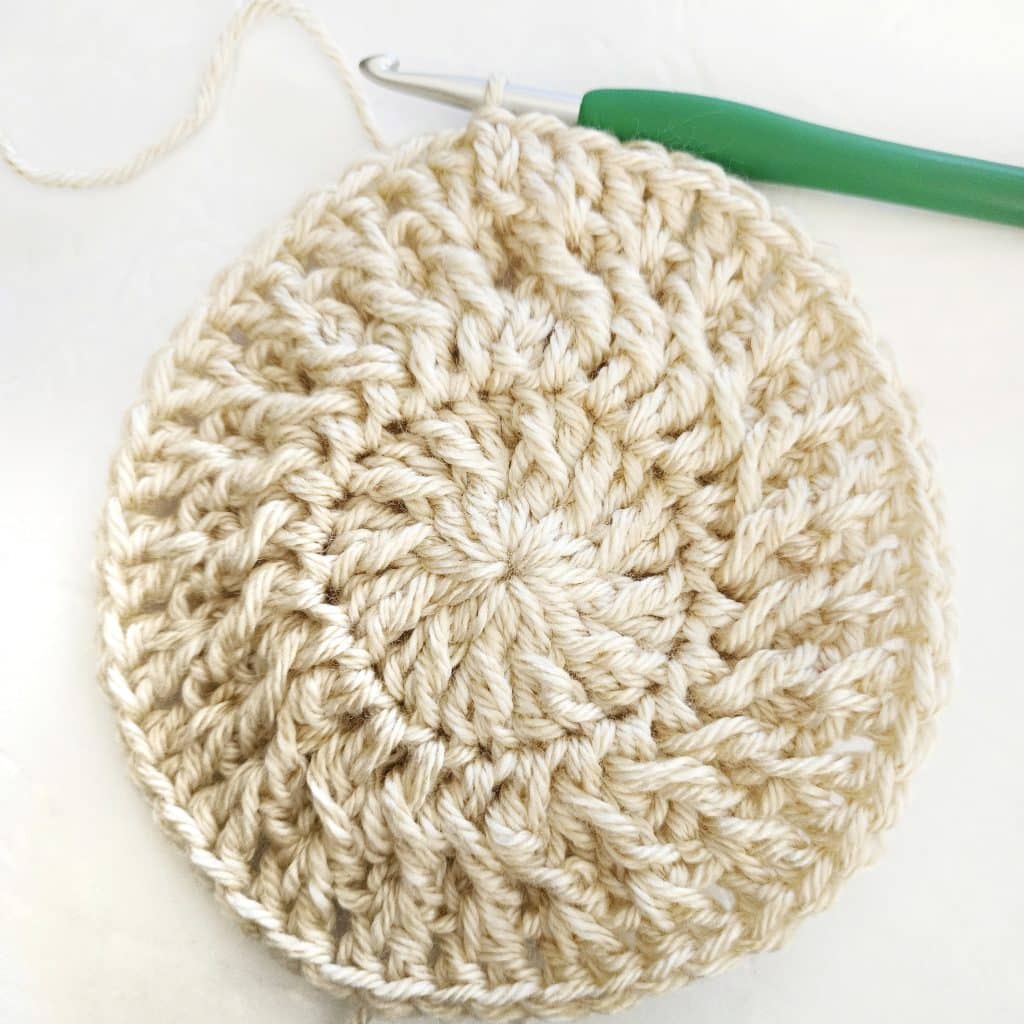
Round 17: ch 1, sc, sc into top of every st around, sl st to top of first sc.
Round 18-19: repeat round 17.
Finishing: fasten off securely after round 19 and weave in loose ends with a yarn needle.

I hope you enjoyed this Dreaming of Winter Crochet Beanie Pattern. If you need any clarification, please feel free to ask! I am more than happy to assist in any way possible.
More Free Crochet Patterns
You might also enjoy some of my other hat patterns like the Elise Crochet Hat Pattern or many more that can be found in my Crochet Hat & Headwear Pattern Collection!
Below you will find FREE crochet patterns and tutorials to enjoy!
- How to Crochet a Hat for Beginners
- 13 Adorable Crochet Cat Hat Patterns
- Winter Crochet Beanie Pattern
- Free and Easy Crochet Sun Hat Patterns for Summer
- 11 Easy Crochet Ribbed Beanie Patterns
- 10 Cute Crochet Dog Hat Patterns to Make For Your Pup
- 14 Free Crochet Beret Patterns
- Neon Rainbow Striped Crochet Hat
- 7 Easy-to-Follow Slouchy Hat Crochet Patterns You’ll Love
- 7 Free Crochet Hat Patterns Using Chunky Yarn
- 6 Easy Crochet Hat Patterns for Beginners
- Crochet Beanie Hat with Pom Pom (Free Pattern)
Could you make a video of this pattern? I’ve ripped out several times. Just can’t figure out where to place my crochet hook in step 3. I just can’t tell what you have done from photos. Thanks.
Hi Donna,
I definitely can. I will try to get that done as soon as possible and post it. Thanks!
Krista
Finished crocheting my hat, it’s beautiful! I had to get help from my instructor on row 4. Will crochet another one for myself. Thank you
Made this and love it- thank you!
Thanks, Jillian!
I am so glad you loved it!
Happy crocheting.
Krista
Do you have to turn every time after row 3?
Hi Jenny,
You do not turn in this pattern because it is worked in rounds, not rows. I hope this helps. If you have any more questions, please let me know.
Krista
Hi,
I really like this pattern, but I’m wondering if the stitch count stays at 48 for every row after round 3? Seems like there would be another increase in round 4.
Hi Kathy,
If you don’t see the stitch count again in the other rows, it means that it is the same as the last stitch count shown.
Happy Crocheting!
Krista
Hi!
I would suggest going up a hook size or two for now. I wrote this pattern so long ago so I don’t have any of the different sizes listed or the gauge. (newbie back then lol) but I am slowly updating my patterns with better instructions and this one is on the list.
Krista
Hi! I agree. I wrote this at the beginning of my crocheting career, and this pattern needs to be revisited. I updated it to say fits child/ teen since that is what 20″ would fit. (of course, depending on head size). Plenty of things can factor into sizing, like the type of yarn used and how loose or tight someone crochets. I will definitely put this on the list of patterns to rework. Thanks! (it has been updated as of 2023.)
Krista
Thank you so much for this pattern! I absolutely loved working it and the end result is so soft and squishy! I made one by the pattern and then made a mini version to use up some yarn (went down to a 5.5 hook and started with 10 stitches instead of 12). I love them both and will definitely be making more! Thank you 🙂
You are welcome Angela! 🙂
Love this pattern Thank you for sharing it. My first beanie turned out a little on the small side (I do seem to have a tighter tension than a lot of people) but now I will make two granddaughters happy. I will be making a second one using chunky yarn and a 6.5mm hook to fit the original recipient. A simple pattern that makes a finished project look amazing. Thanks again for sharing this pattern for free.
Hi Krista,
This is the first time I have tried doing the fpdc.I love the look of this pattern but for some reason it’s not coming out right.is the chain 3 beginning of each row suppose to be counted as dc?when I get to the end of row 2 I’m ending up with either 23 or 25.
Hi Kelly,
THe chain 3 doesn’t count 🙂 You will have 12 dc’s in the first round then 2 fpdc’s around each one of those dc’s from the first round to equal 24. Hope this helps 🙂
Krista
Nevermind. I got it. Love the pattern! Thank you for sharing.
Glad it worked out! 🙂
Hi Krista~
I’m trying hard to get this pattern to work for me. I’m blaming operator error.
Whenever I’m doing the fpdc, it makes a very thick “seam” on the inside. Is this normal?
Thank you for the pattern.
Cathy
Hi Cathy,
It sometimes can depending on the type of yarn that is used. Hope this helps 🙂
How would I go about making this a larger size? I have a guy in my family that loves this texture on a beanie! I tried to start out with more DC in the initial ring but after row 3 or 4 it just made it ruffled.
HI Larisa,
Right Nnow I only have this written as one size but I hope to expand the sizes in the future. 🙂
Hey, if you haven’t already figured this out, I thought I’d throw in my 2 cents. 🙂
I am a self taught crocheter and am only in my 4th month of crochet life. I found row 4 to be very well told in the directions. On row 3, you’ll notice that the fpdc’s kinda “pop” out towards you, and the dc’s kinda hide back behind them. Basically, in row 4, you skip all the dc, and do another fpdc in all the previous “popped out” ones from row 3. Once you do one (fpdc) though, you come back and do one around the dc. Then you move forward to the next “popped out” (fpdc), so it’s almost like 2 steps forward, 1 backward, repeat. All the way around. Does that make any sense at all?? Lol! In my head it makes perfect sense, but on paper I feel as tho I sound like a complet crochet nerd! (Which I am quickly becoming!) let me know if you need more help!
Krista, bless you for this pattern. I LOVE LOVE LOVE it! It’s a gorgeous modern twist on an age old technique! Very beautiful and unique texture. I’m making one for everyone and adding a nice flower for even more pizazz. This is by far my most favorite thing I have made this far!! You are so awesome for sharing this!!!
Thank you Ashley for explaining it the way you did and for the kind words! I appreciate it.
Hi Christina,
There is a sk st (not CH like I had written). I fixed it to reflect the correct terminology. I write these patterns myself and there are bound to be mistakes because I am human. This FREE pattern also had picture examples with written detail on them and links to how to’s for some of the harder st’s. I am not sure what else I could have done to be more clear.
Krista
HI Dominique,
Just saw your comment right now! I don’t do video lessons as of right now but its something I am hoping to do in the future. Thank you for the kind words!! 🙂 If you still need help with this please email me at rescuedpaw@gmail.com.
I’m having the exact same problem!!! All good until row 4?!?