Bullion or Roll Stitch Crochet Tutorial
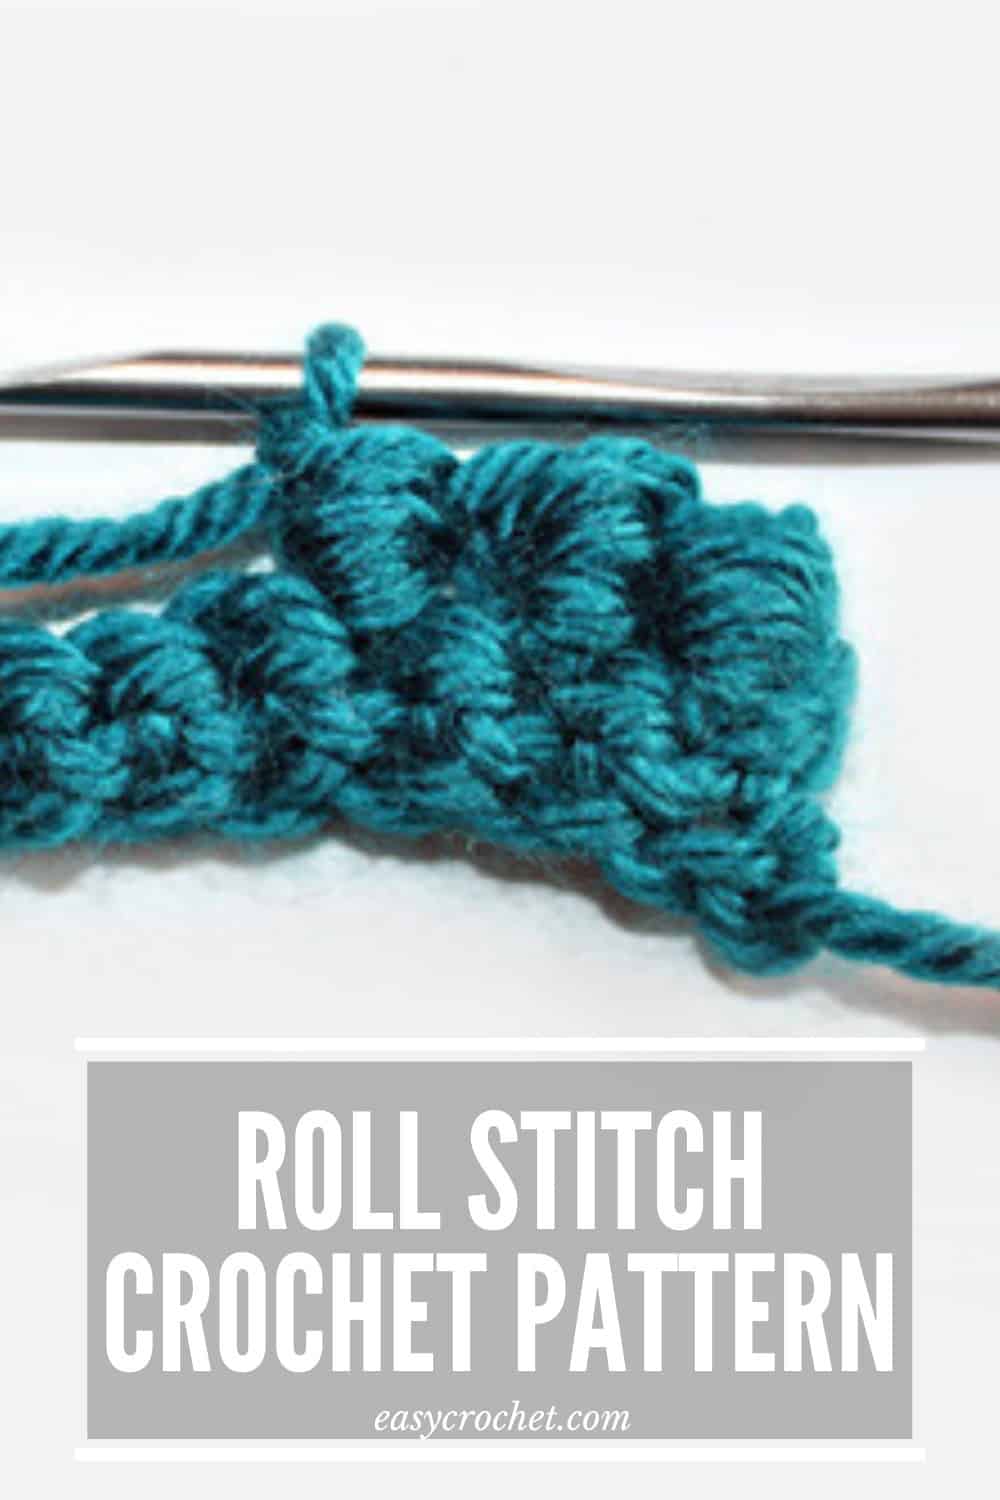
The roll stitch, also known as the bullion stitch, is a wonderful technique that give crochet projects a cool look and feel. This stitch just consists of wrapping yarn around a crochet hook and pulling through all loops when a desired number of wraps is reached.
The Yarn & Hook
I used Lion Brand Skein Tone Yarn for my example, but Caron Simply Soft would work great too! Be sure to use the crochet hook size as stated on the yarn package. You may also want to have a pair of scissors to cut the yarn if needed.
I linked up the yarn I used and my favorite hooks as well below if you’d like to take a look.

Crochet Stitches in a Bullion Stitch
To make a bullion stitch in crochet you will need to know a few basic stitches. These crochet stitches are easy to learn and fun to make.
While the stitches are easy, the technique can be tedious due to pulling back through the coil of loops, so I marked this tutorial intermediate.
Ready to Get Started?
If you’re ready to start crocheting, then the full tutorial is below! As a reminder, I will be explaining this stitch by wrapping the yarn around 5 times, but you can do more or less wraps in your project if you wish.
I hope you enjoy the bullion crochet stitch tutorial!
Crochet Roll / Bullion Stitch Tutorial
Skill Level: Intermidate
Materials
- Any yarn weight or brand. I used Skein Tones Yarn from Lion Brand.
- A crochet hook that corresponds to the yarn you have selected. I used a 4.5 mm crochet hook.
- Scissors
Crochet Abbreviations
- ch = chain
- st(s) = stitch(es)
- sc = single crochet
- yo = yarn over
- rep = repeat
Notes
- The crochet stitch tutorial is written in standard US terms
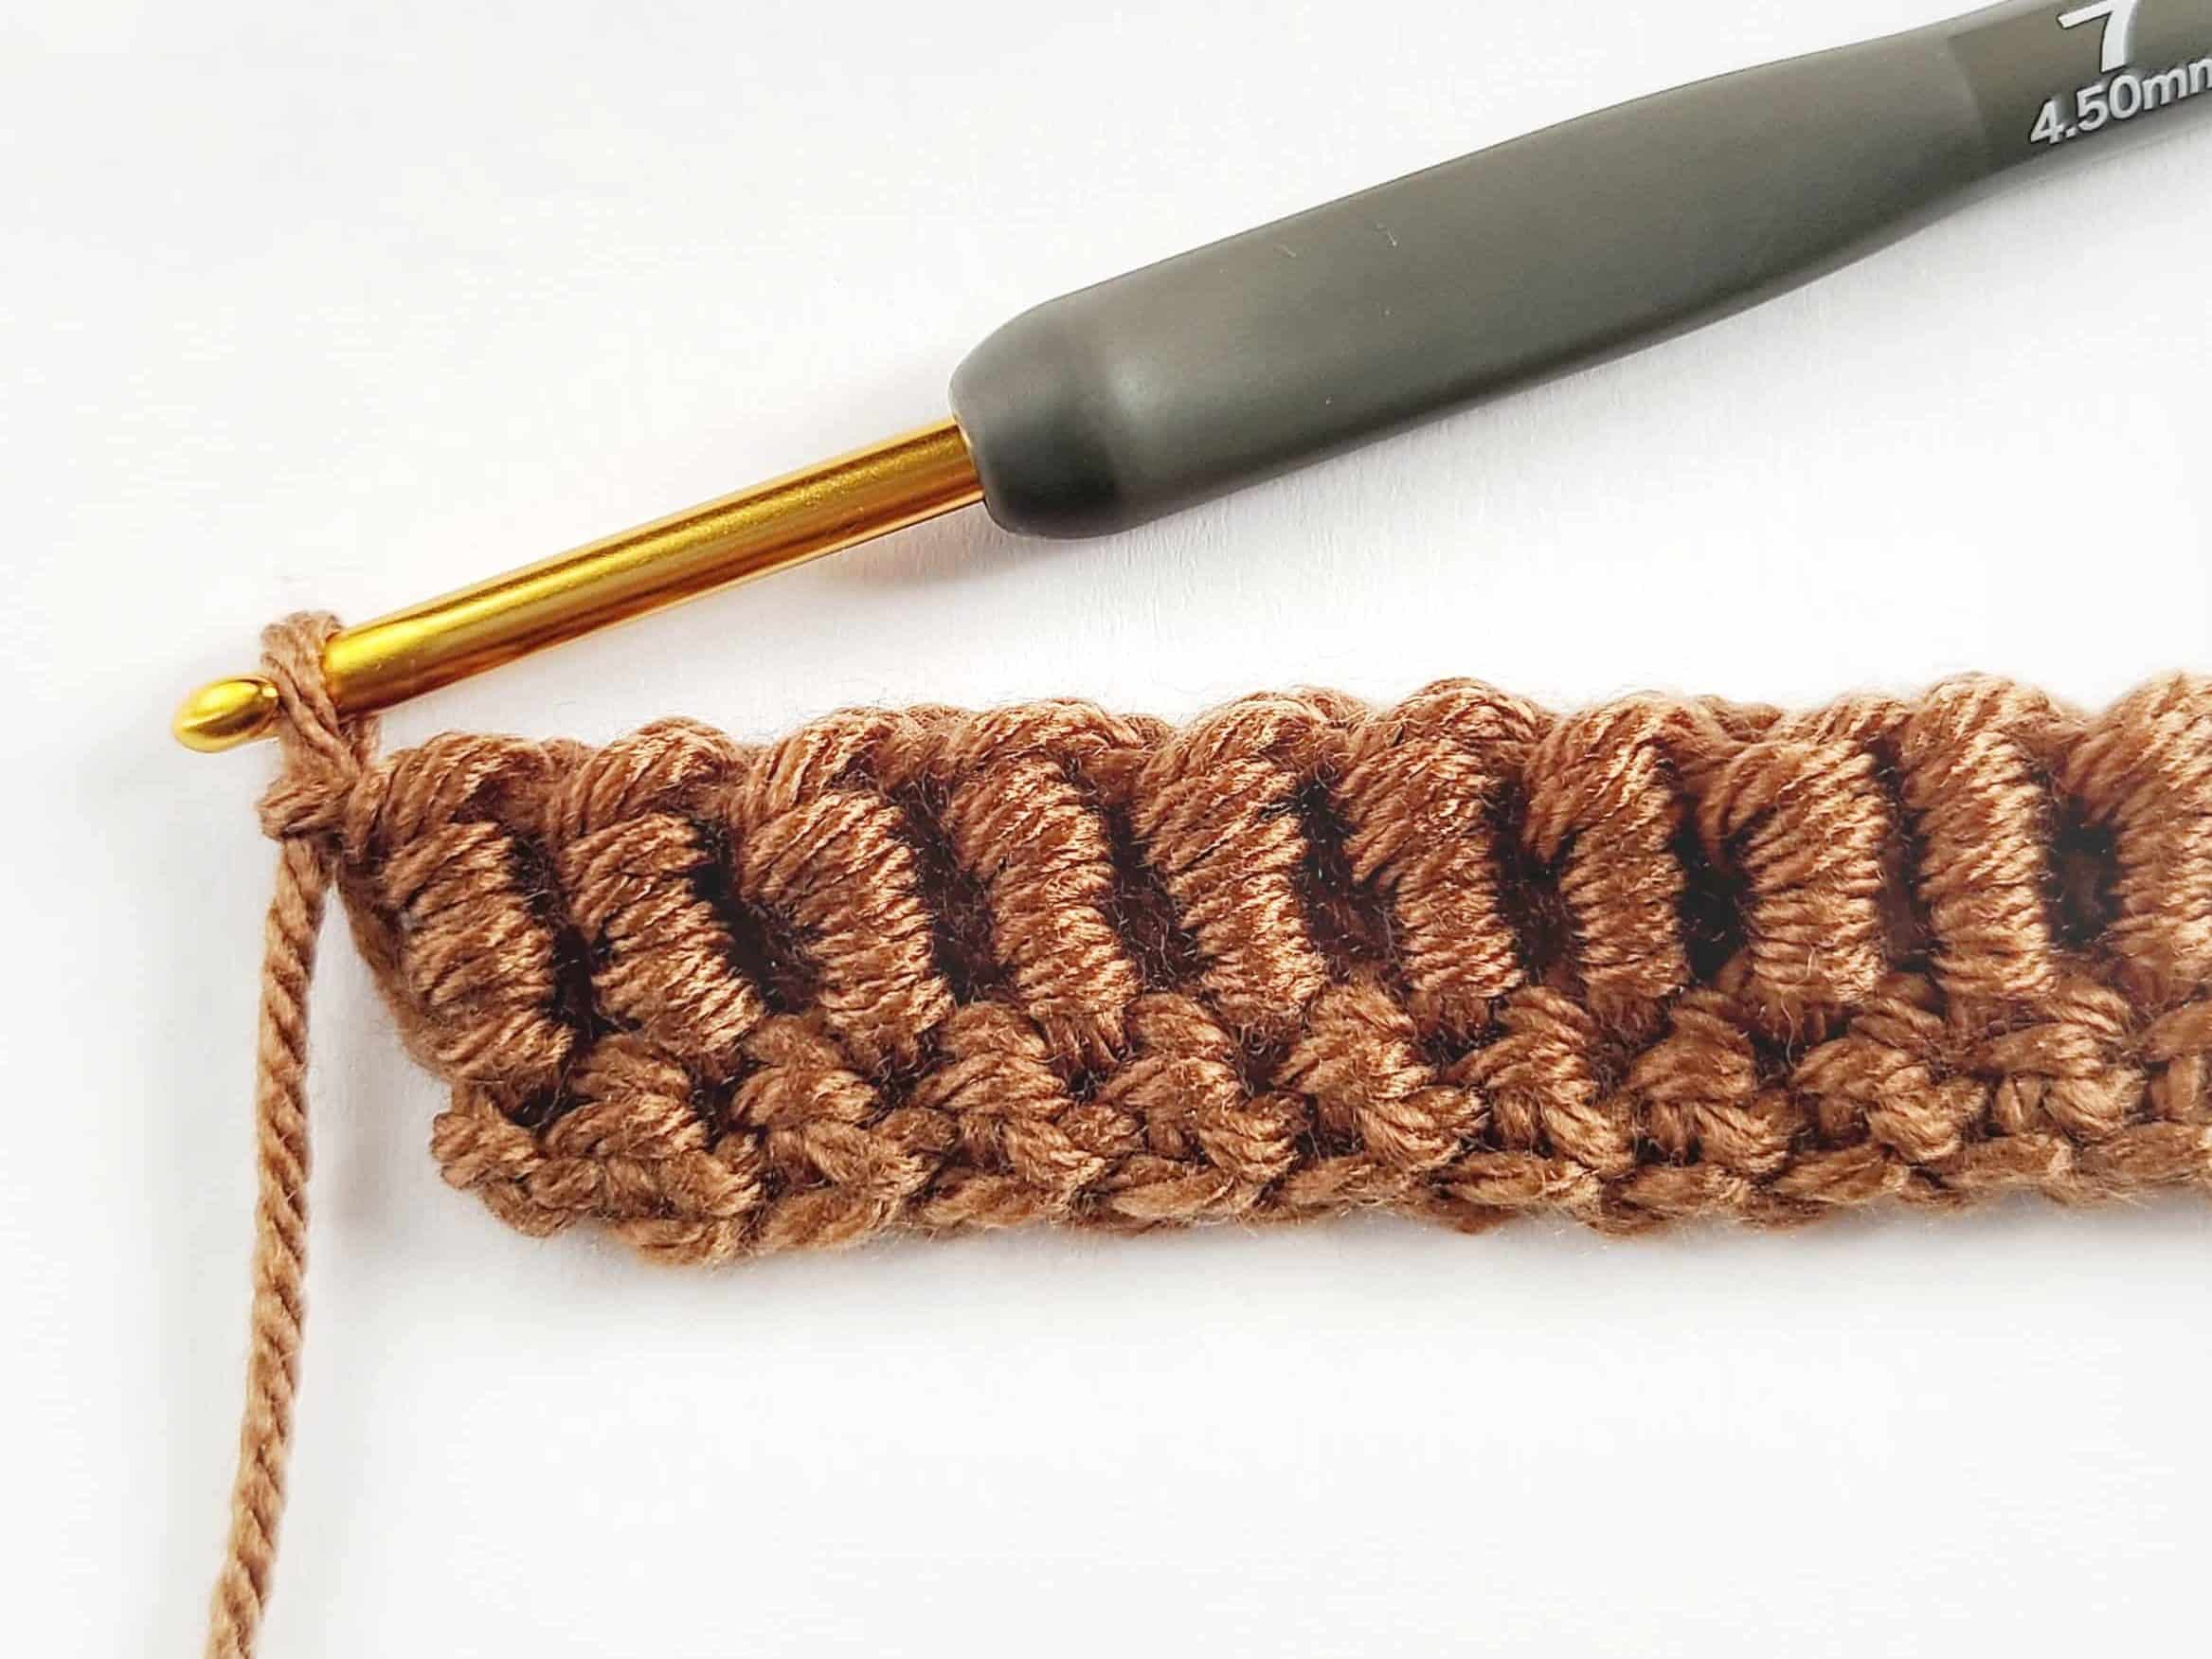
Bullion Crochet Stitch Pattern
Row 1
Step 1:
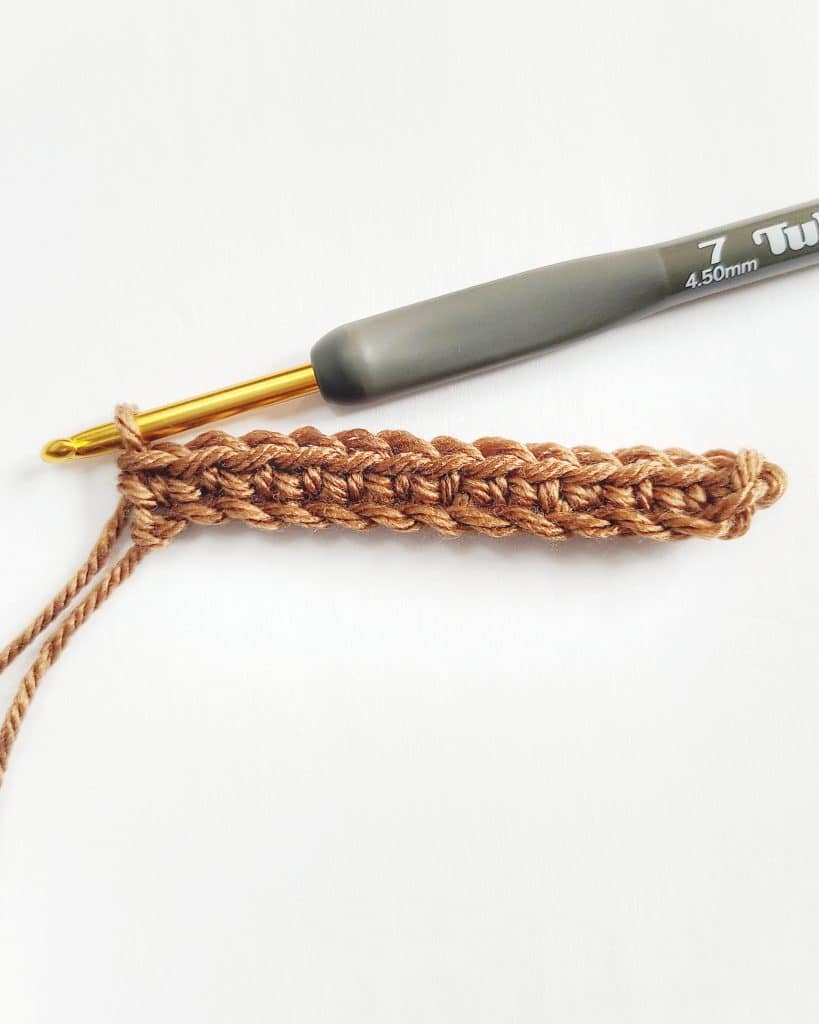
Ch any number of sts for a foundation ch. I started with 14.
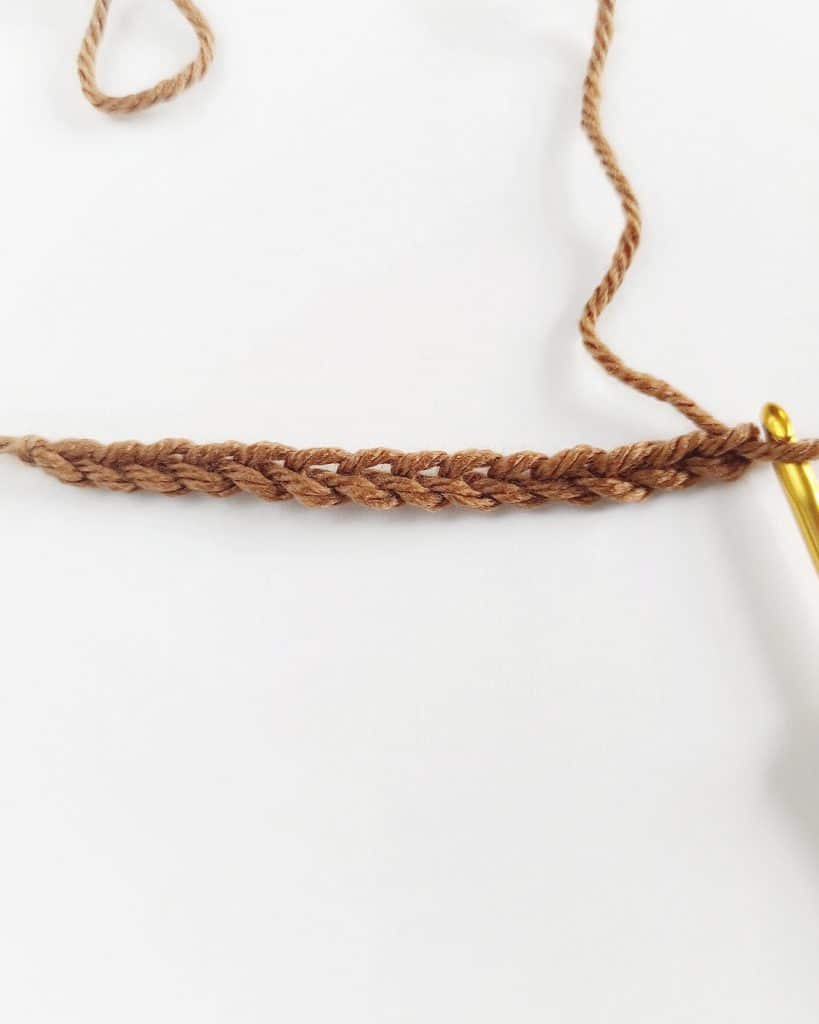
STEP 2:
Sc into the first ch and into each st across to complete row 1.
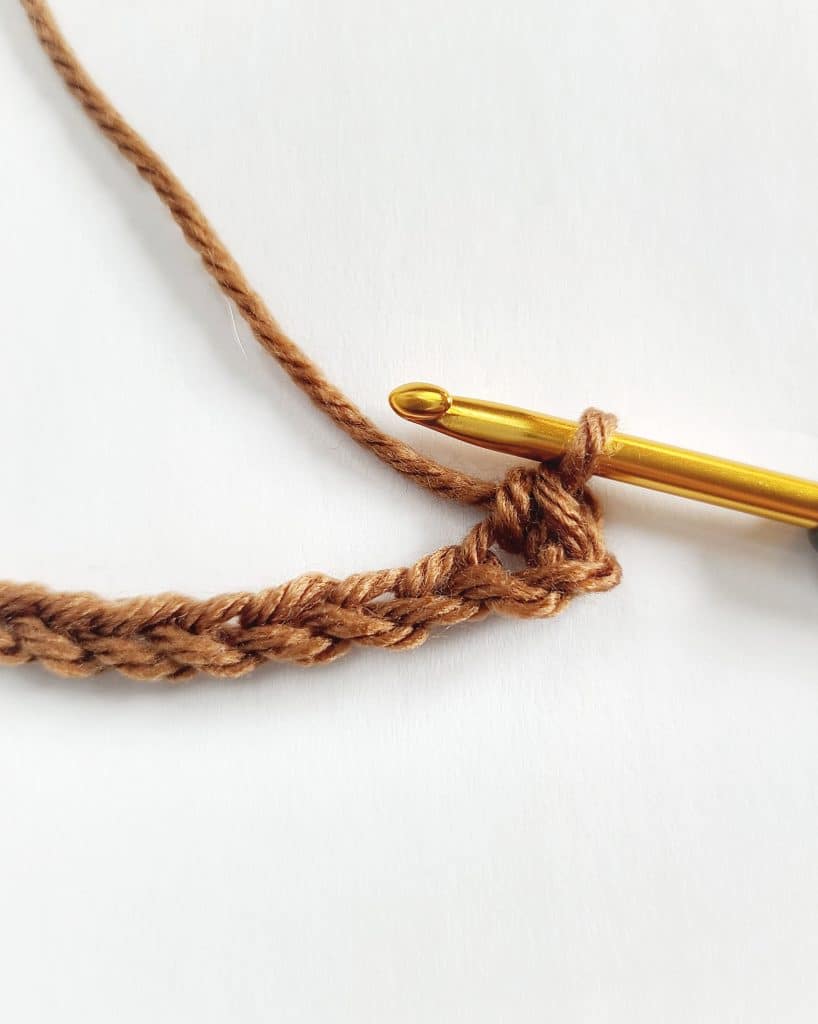
Row 2
STEP 3:
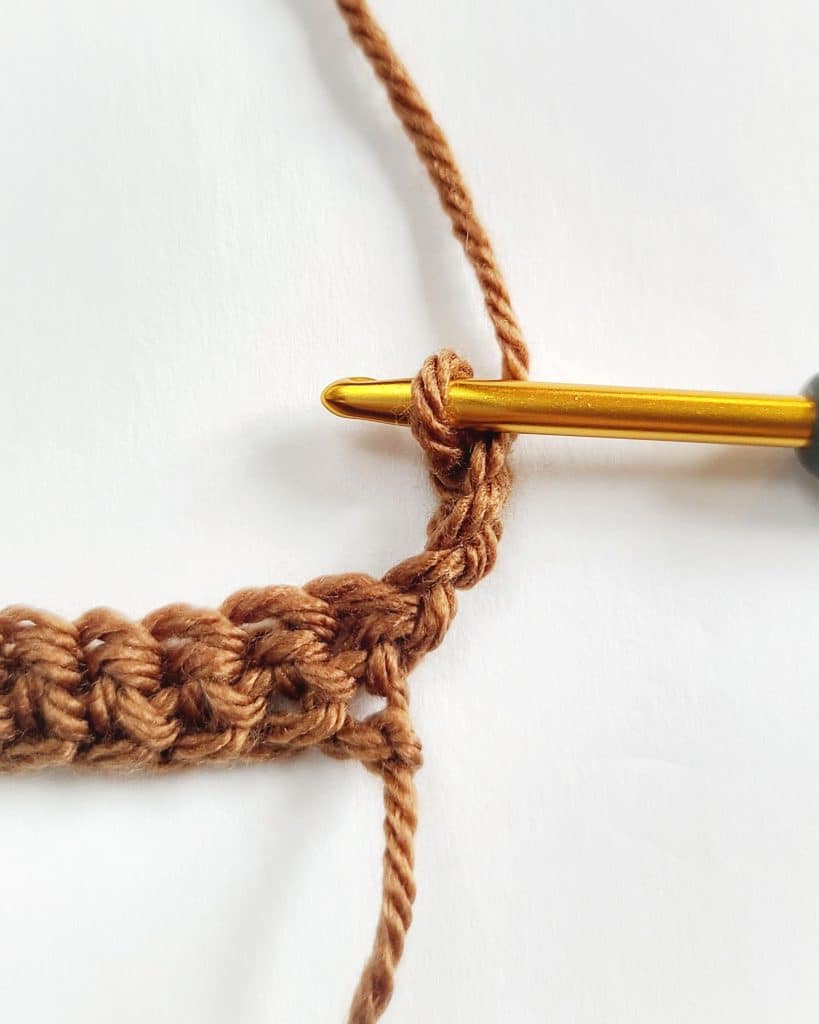
Turn your work and ch 3
STEP 4:
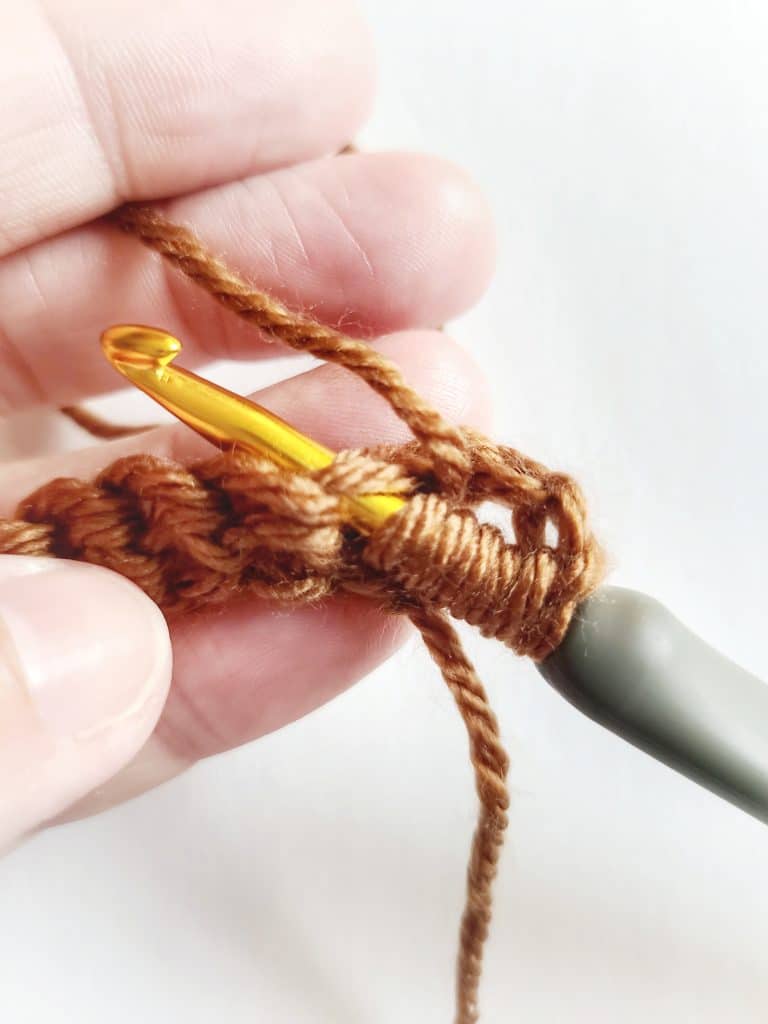
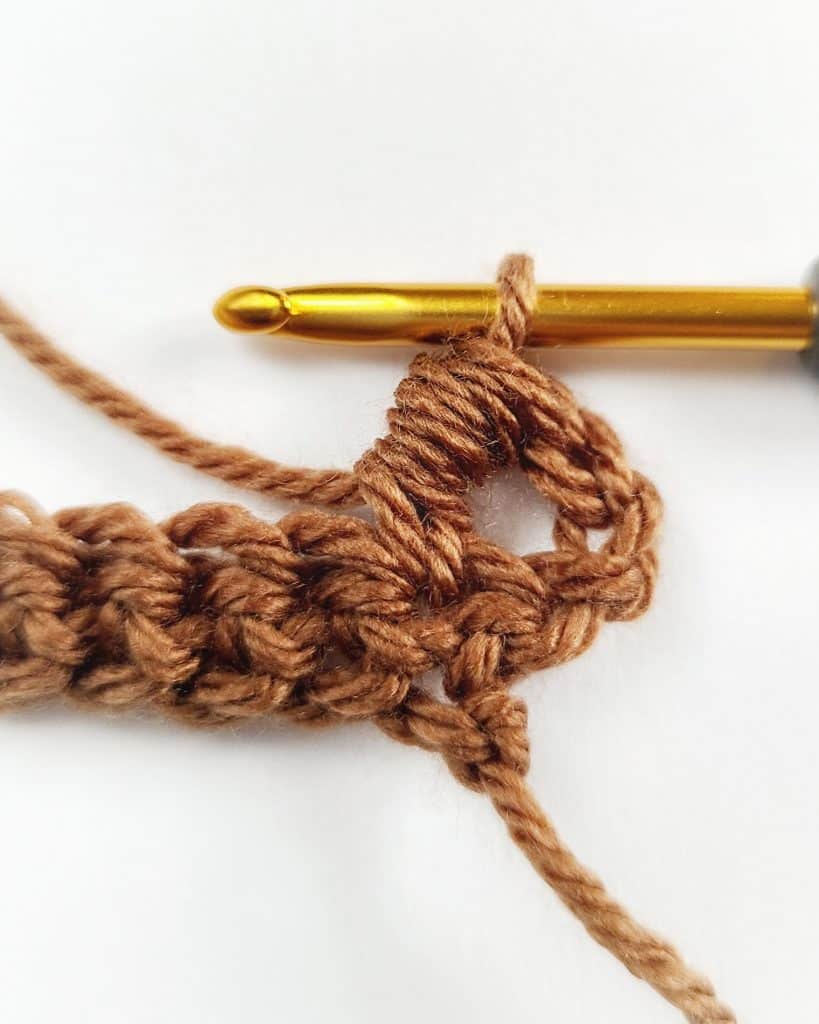
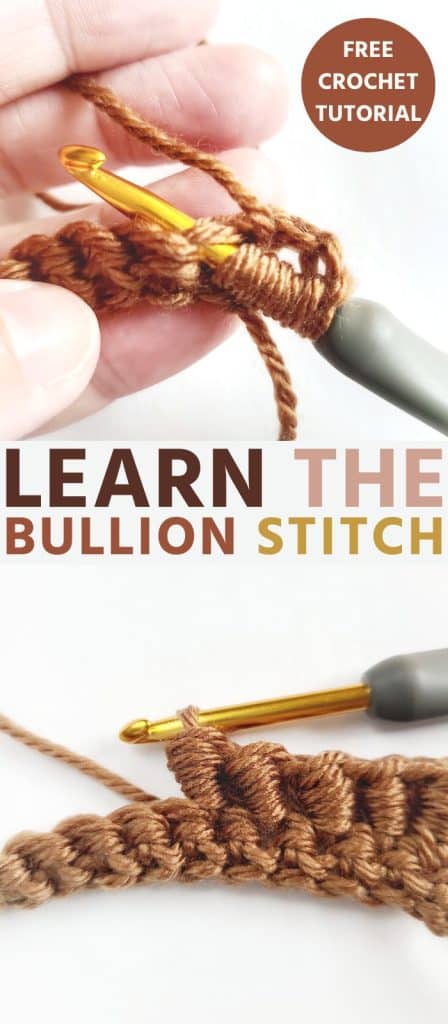
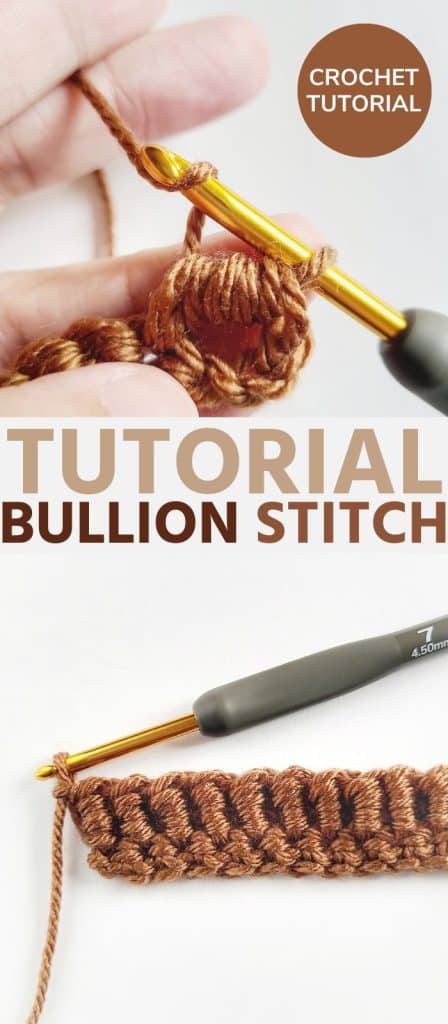
Wrap yarn around the crochet hook 5 times, insert into the next sc
STEP 5:
Yo the hook and pull back through the sc bringing up a loop
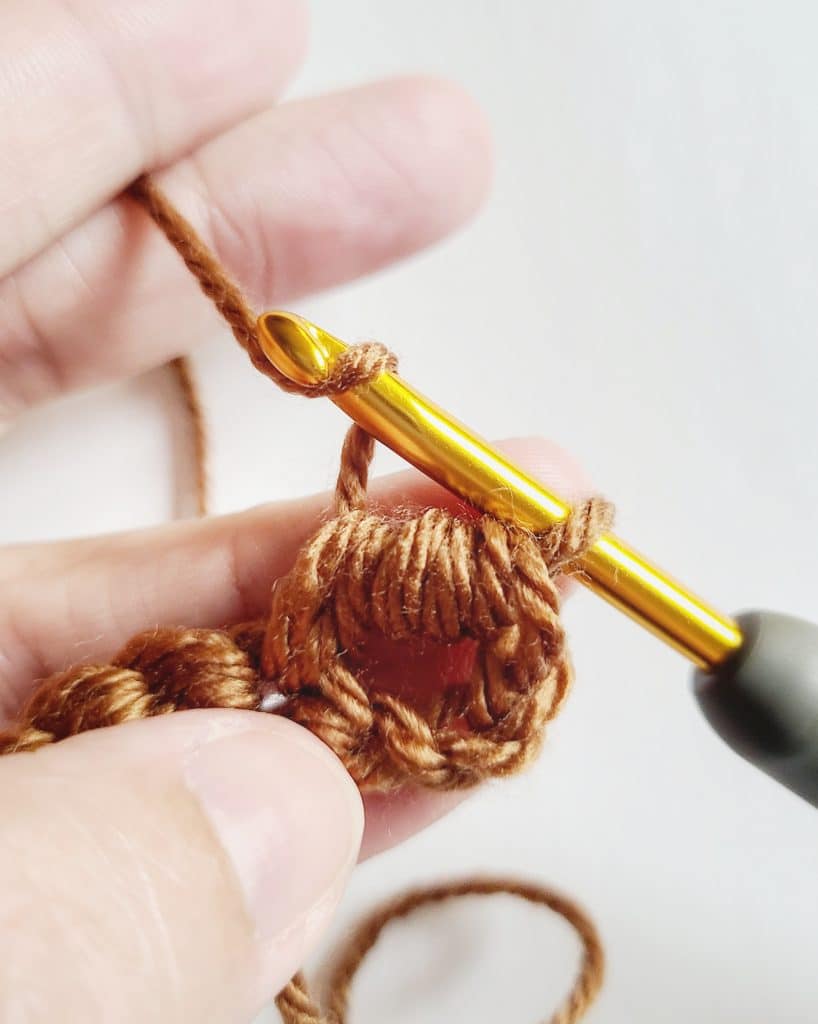
STEP 6:
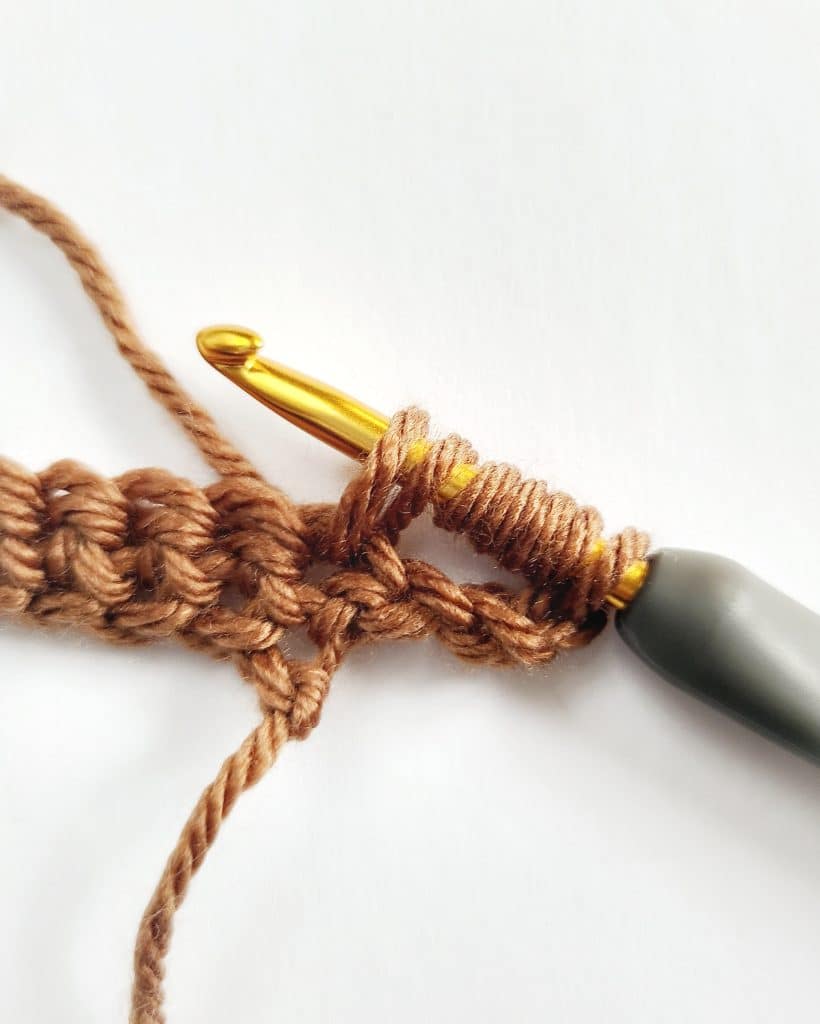
Yo the hook again and pull back through the coil of loops on the hook carefully. You may need to pull up each of the loops indivually off the hook with your finger.
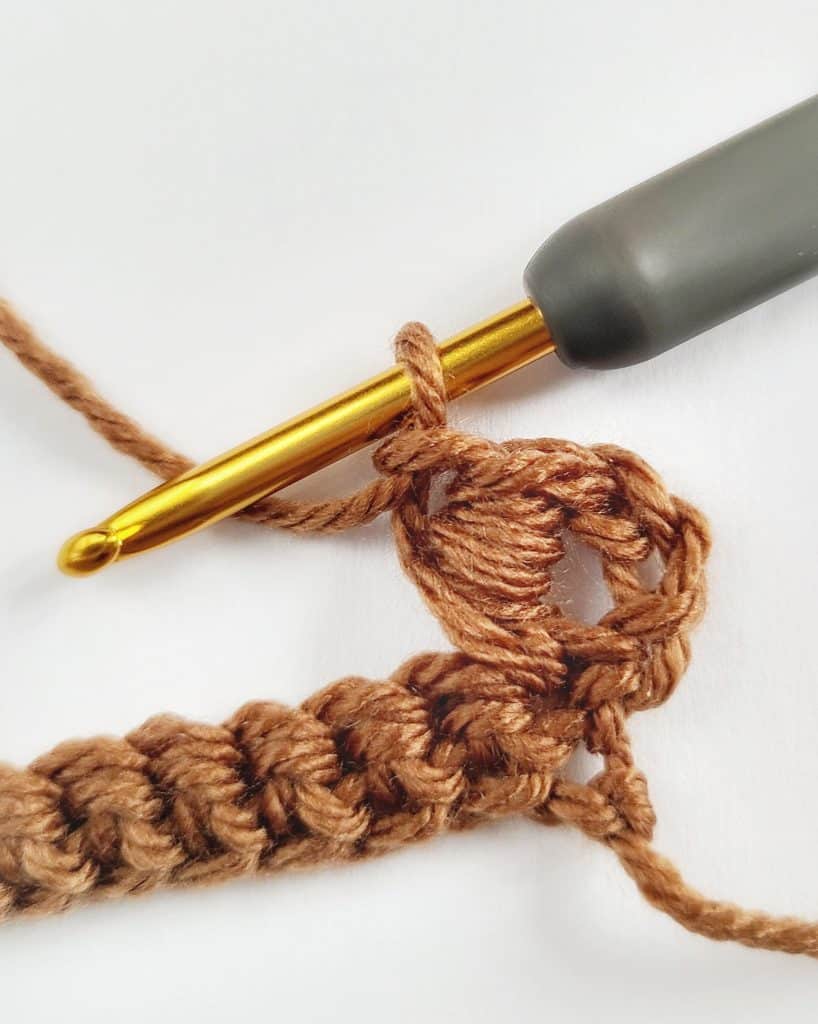
STEP 7:
Yo the hook and draw the the remaining loop (st) on the hook
STEP 8:
Rep steps 2-7 to continue across the row
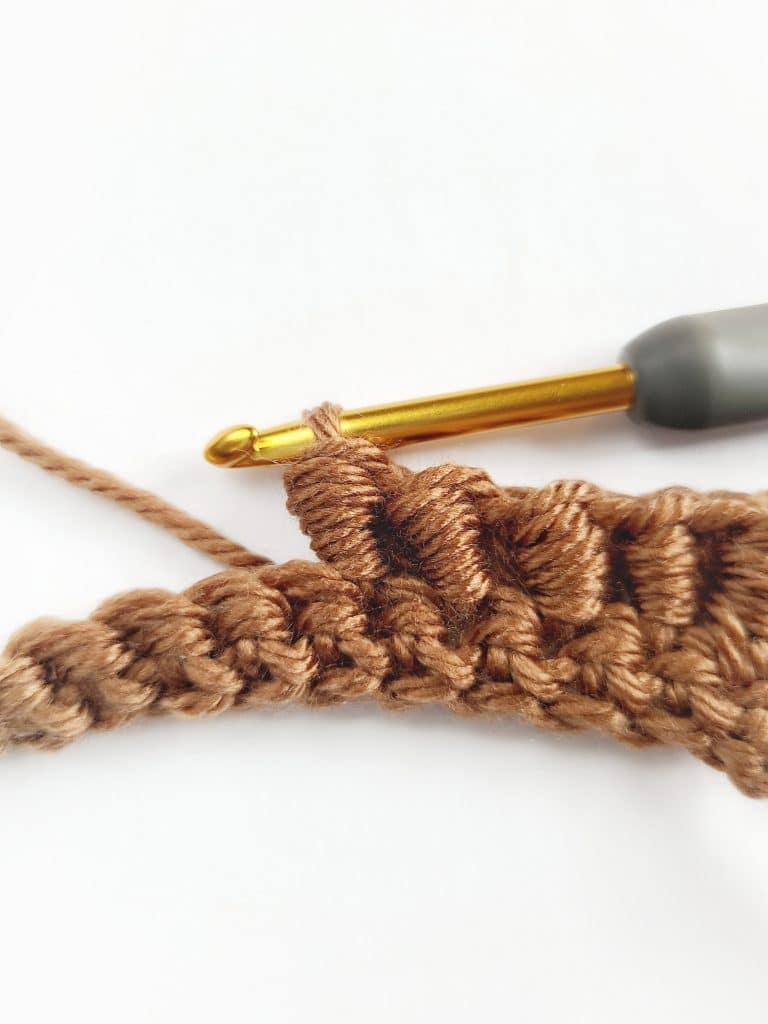
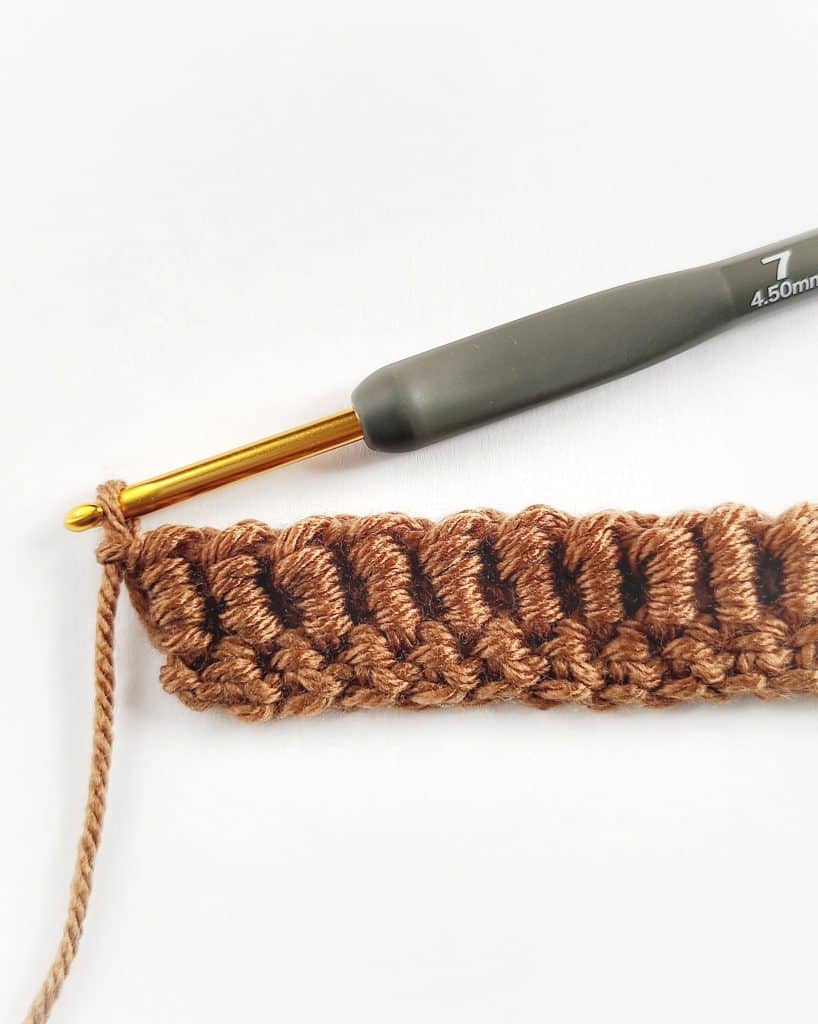
STEP 9:
ch 3 and rep row 2 for as many rows as you’d like.
The bullion stitch row is now complete!

If you enjoyed the bullion tutorial and would like to learn it at another time, please take a second to share it on Pinterest to save for later. You can use the two images below if you’d like that I created.
More Free Crochet patterns & Tutorials
- 25 Warm Weather Crochet Patterns To Make
- 18 Cute Crochet Cow Patterns
- 30 Free Crochet Baby Blanket Patterns
- 12 Crochet Graduation Gifts To Make This Year
- 50 Easy Crochet Ideas For When You Can’t Make Up Your Mind
- 15 Free and Easy Moss Stitch Crochet Patterns
- 25 Crochet Gifts for Men (All Free Patterns)
- 5 First Crochet Patterns for Beginners
- 24 Free Shamrock and Clover Crochet Patterns
- 16 Free and Easy Modern Crochet Bag Patterns
2 Comments